Old Fashioned Raisin Pie Recipe – Classic Dessert
This post may contain affiliate links (disclosure).
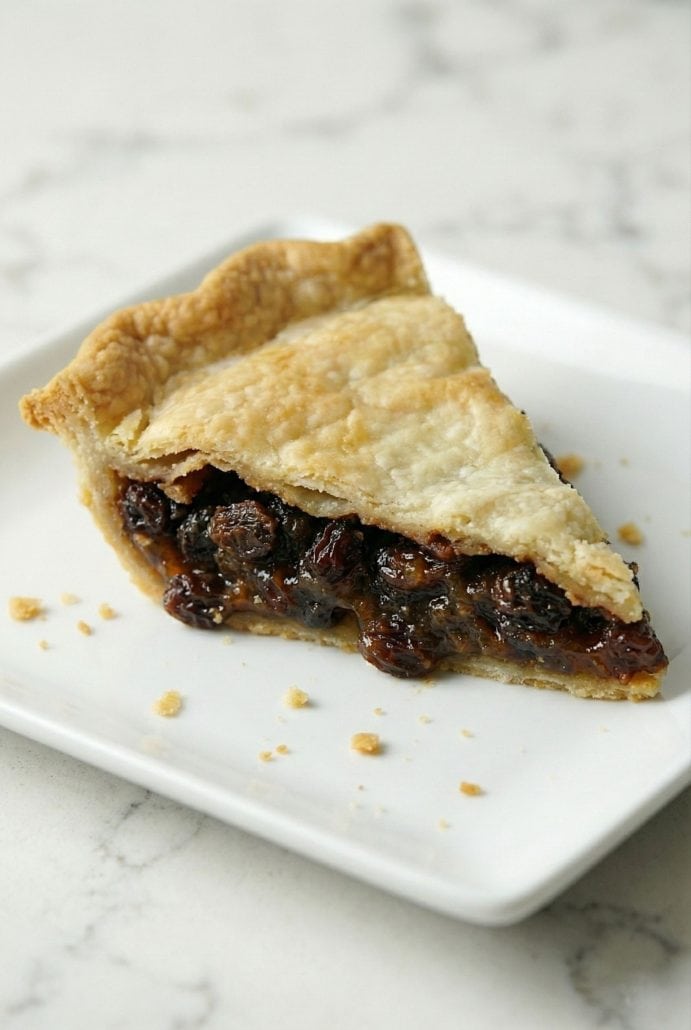
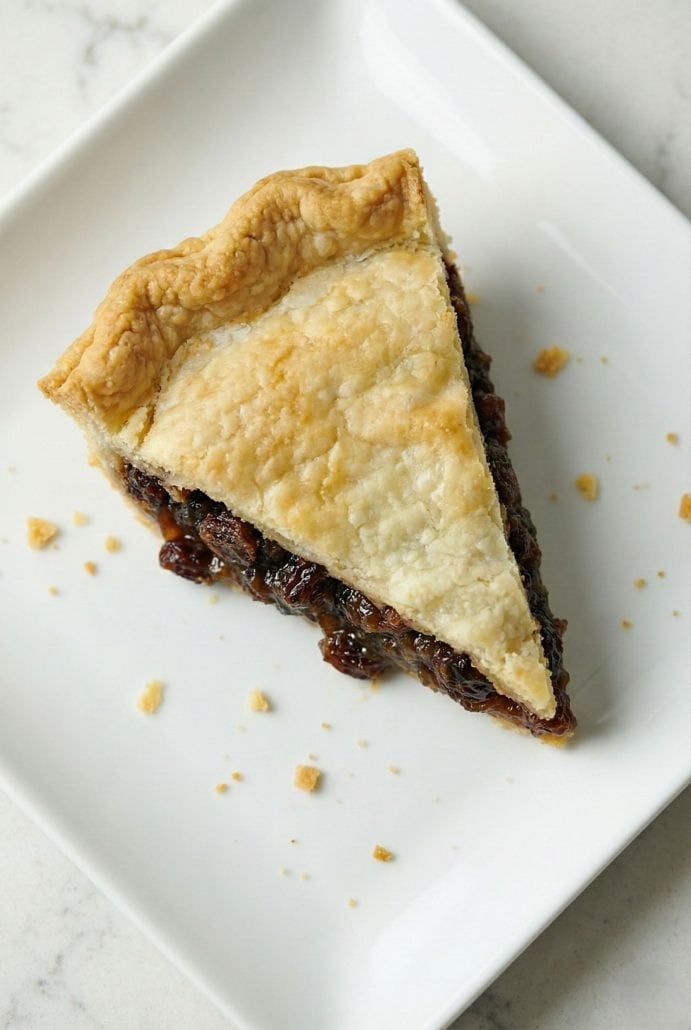
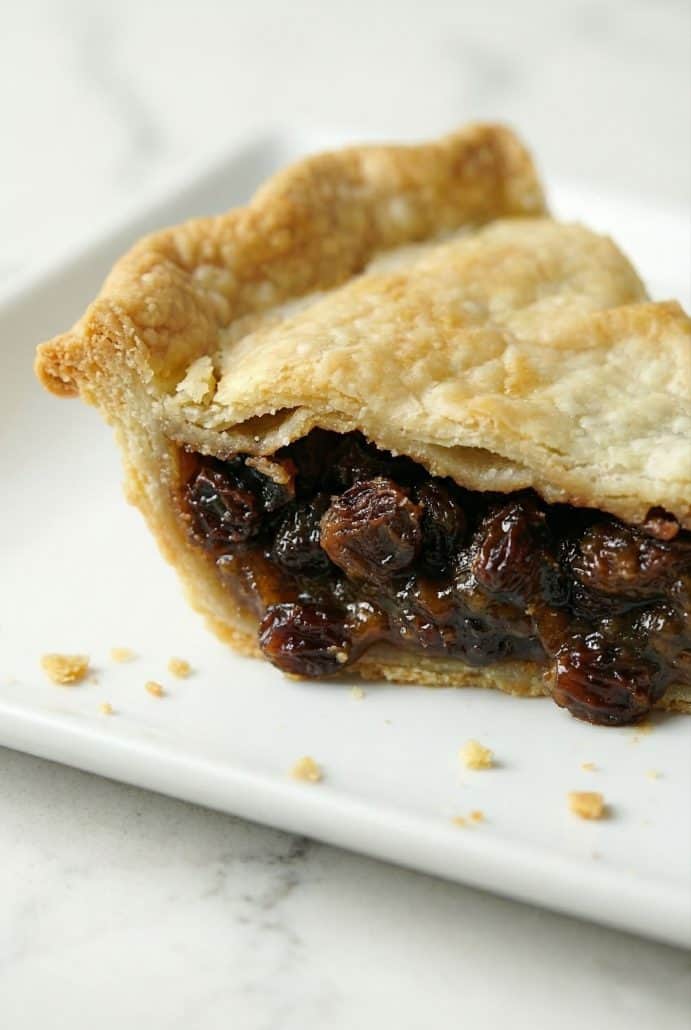
If you’re craving a cozy, vintage dessert that tastes like something Grandma used to make, this Old Fashioned Raisin Pie is for you! Bursting with plump raisins and warm spices, this simple pie recipe has been loved for generations, and it’s still just as delicious today. With a flaky, golden crust and a gooey raisin filling, this classic dessert is easy to make and perfect for holidays, Sunday dinners, or anytime you want a comforting sweet treat.
Want to save this recipe?
Why You’ll Love Old Fashioned Raisin Pie
-
It’s full of nostalgic flavor – This pie brings back memories of cozy kitchens and family gatherings. The sweet raisins and hint of cinnamon create that timeless, homemade taste you know and love. It’s a dessert that feels like a warm hug!
-
Simple ingredients, big flavor – You only need a handful of pantry staples to make this pie. There’s no need for fancy ingredients or equipment, just basic items you likely already have on hand. Yet the result is rich, flavorful, and deeply satisfying.
-
Perfect for any occasion – Whether you’re making it for a holiday meal, a potluck, or a Sunday dinner, this raisin pie fits right in. It’s elegant enough for special occasions but easy enough for everyday baking. Serve it warm with ice cream for an extra-special treat.
-
Beginner-friendly baking – This is a great recipe for home bakers of all levels. The steps are simple, and you don’t need to make the crust from scratch (unless you want to!). It’s a reliable pie that turns out beautifully every time.
-
Unique and memorable dessert – Raisin pie isn’t something you see every day, which makes it stand out. It’s a fun way to introduce friends and family to a vintage recipe they might not have tried before. Expect compliments and second helpings!
Ingredients For Old Fashioned Raisin Pie
-
Raisins – These are the star of the pie, bringing natural sweetness and a chewy texture.
-
Water – Used to plump up the raisins and create the syrupy filling.
-
Brown sugar – Adds rich, caramel-like sweetness that pairs perfectly with the raisins.
-
Cornstarch – Helps thicken the filling so it sets up nicely when baked.
-
Ground cinnamon – Brings warm, comforting spice to balance the sweetness.
-
Salt – Just a pinch enhances all the other flavors.
-
Distilled white vinegar – Adds a touch of tang that brightens the filling and balances the sweetness.
-
Butter – Adds richness and smoothness to the filling.
-
Double-crust pie pastry – Makes the flaky, golden crust that holds everything together. You can use store-bought for convenience or homemade if you prefer.
For the exact measurements of the ingredients, see the printable recipe card at the bottom of this article.
Kitchen Tools You Need To Make Old Fashioned Raisin Pie
-
Saucepan – Used to simmer the raisins and cook the filling until thick.
-
Mixing bowl – For combining the dry ingredients before adding them to the raisin mixture.
-
Measuring cups and spoons – Essential for measuring out the ingredients accurately.
-
9-inch pie dish – To bake the pie to golden perfection.
-
Rolling pin (optional) – Only needed if you’re rolling out your own pie dough.
-
Knife – To cut slits in the top pie crust for venting steam.
-
Oven – For baking the pie until the crust is golden and crisp.
How To Make Old Fashioned Raisin Pie
-
Start by simmering raisins in water for a few minutes to plump them up.
-
While they simmer, stir together brown sugar, cornstarch, cinnamon, and salt.
-
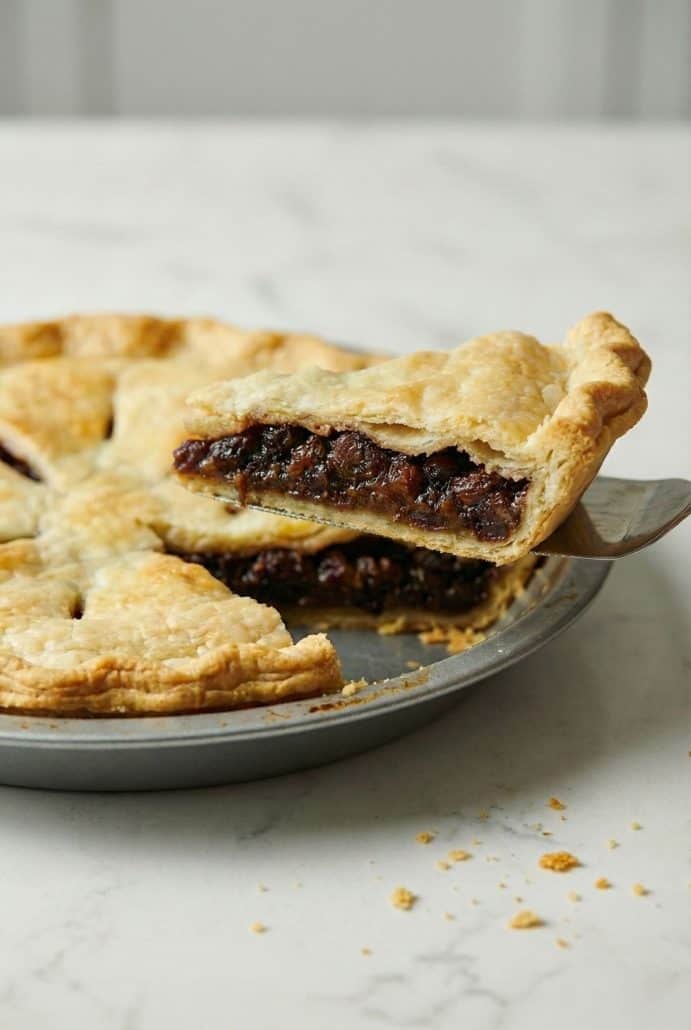
Mix the dry ingredients into the raisin mixture and cook until it thickens into a glossy, syrupy filling.
-
Add vinegar and butter, then let the filling cool while you prep your crust.
-
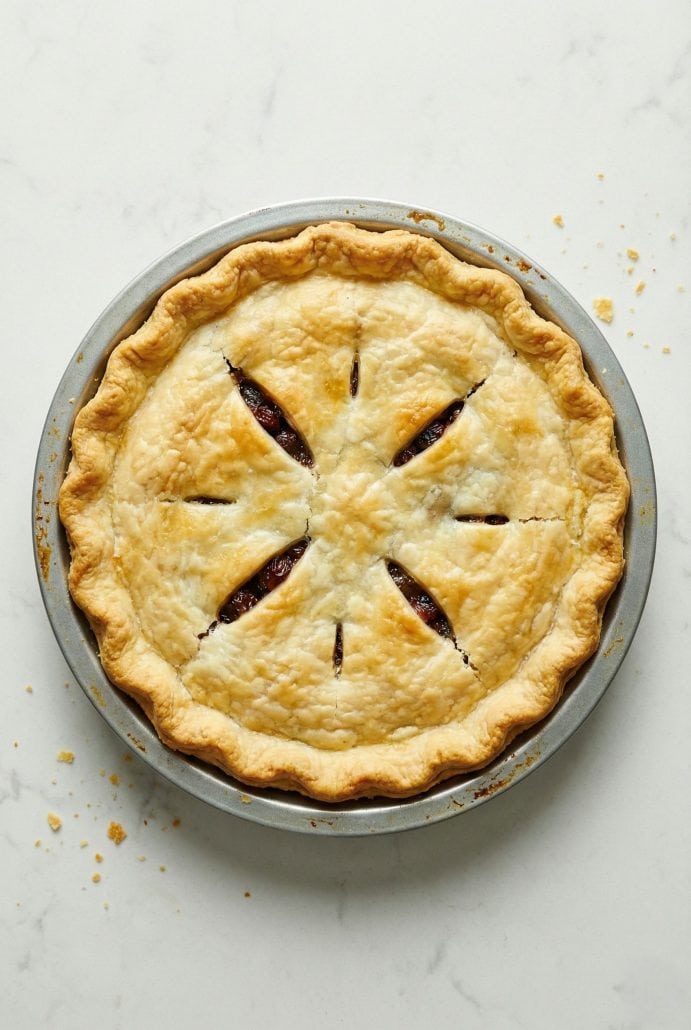
Pour the filling into the bottom crust, top with the second crust, and seal the edges. Don’t forget to cut a few slits for steam to escape!
-
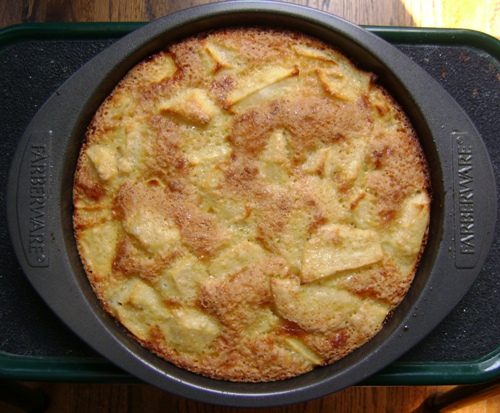
Bake until the pie is golden brown and bubbly, then let it cool before slicing and enjoying.
Serving Suggestions
-
Serve warm slices with a scoop of chocolate banana ice cream or a dollop of vanilla whipped cream for a classic, comforting dessert.
-
For a holiday table, pair it with other traditional favorites such as homemade pumpkin pie or classic apple pie to offer a nostalgic variety.
-
Add a sprinkle of powdered sugar on top just before serving for a pretty presentation.
-
Serve it alongside a hot cup of black coffee or lemon honey tea for a cozy afternoon treat.
Want to save this recipe?
-
For brunch or a sweet breakfast treat, try it chilled with a side of fresh blueberries.
Tips For Success
-
Use fresh raisins for the best texture – Fresh, soft raisins give you a plumper, chewier filling. If your raisins are older or a bit dry, soak them in warm water for 10–15 minutes before cooking.
-
Stir constantly while cooking the filling – Once you add the brown sugar and cornstarch mixture to the raisins, stir continuously. This helps prevent lumps and ensures a smooth, glossy syrup.
-
Let the filling cool slightly before assembling the pie – Pouring hot filling into the crust can cause the bottom to become soggy. Cooling it a bit helps the pie bake more evenly and keeps the crust crisp.
-
Seal the crust edges well and cut slits on top – This keeps the filling from bubbling out and allows steam to escape, giving you a nicely browned and evenly baked top crust.
-
Use a baking sheet under the pie (optional but helpful) – If you’re worried about spills or drips, place a sheet pan under the pie dish to catch any overflow during baking.
-
Let the pie rest before slicing – This gives the filling time to firm up, making cleaner slices and keeping the pie from falling apart.
-
Feel free to customize the recipe – This pie is a great base you can adapt to your tastes—try adding chopped nuts, a splash of rum, or swapping in golden raisins for a twist!
Variations And Substitutions
-
Use golden raisins for a lighter flavor – Golden raisins (also called sultanas) offer a slightly different taste, more mild and fruity compared to regular dark raisins. They’ll still plump up beautifully and give your pie a unique twist while keeping that classic feel.
-
Add chopped nuts for texture – A handful of chopped walnuts or pecans adds a delicious crunch that contrasts nicely with the gooey filling. Toast the nuts beforehand for extra flavor, or leave them raw for a more subtle texture.
-
Try a splash of rum or brandy – Adding 1–2 tablespoons of dark rum or brandy to the filling gives the pie a rich, warm depth. It’s a great way to enhance the old-fashioned flavor—just stir it in at the end with the butter and vinegar.
-
Make it dairy-free – The only dairy ingredient is the tablespoon of butter. Simply swap it with a dairy-free alternative like vegan butter or margarine to make the whole pie dairy-free.
-
Use a homemade crust if preferred – Store-bought crust is convenient and works great, but if you have a favorite homemade pie crust recipe, go for it! Just be sure to chill the dough and use two crusts—one for the bottom and one for the top.
-
Swap the vinegar for lemon juice – If you don’t have white vinegar, fresh lemon juice works just as well. It adds a hint of brightness to balance the sweetness of the raisins.
-
Make mini hand pies – Instead of one 9-inch pie, you can use the filling to make mini hand pies. Cut dough into circles, spoon in a bit of filling, fold over, and seal. Bake until golden for cute, portable treats!
-
Add spice for warmth – Boost the flavor by adding a pinch of ground cloves or nutmeg with the cinnamon. These spices pair beautifully with raisins and give the pie even more cozy character.
-
Make it gluten-free – Use a gluten-free pie crust and swap the cornstarch for a gluten-free thickener like arrowroot or tapioca starch. Just double-check that all your ingredients are certified gluten-free.
-
Turn it into a raisin crumble pie – Skip the top crust and sprinkle on a brown sugar oat crumble topping instead! This gives you a delicious texture contrast and a fun variation on the traditional pie.
Storage and Reheating
-
Room Temperature – If you plan to eat the pie within a day, you can keep it covered at room temperature. Use plastic wrap or foil to keep it from drying out.
-
Refrigerator – For longer storage, cover the pie tightly and refrigerate for up to 4 days. The filling will stay firm and flavorful, and the crust will hold up well.
-
Freezer – You can freeze the whole baked pie or individual slices. Wrap it well in plastic wrap and then foil, or place in a freezer-safe container. Freeze for up to 2 months. Thaw in the refrigerator overnight before reheating.
-
Reheating Slices – To reheat a slice, place it on a microwave-safe plate and warm for about 30 seconds to 1 minute. For a crisper crust, reheat in the oven or air fryer at 300°F for about 5–10 minutes.
-
Reheating the Whole Pie – If you want to reheat the entire pie, cover it with foil and warm it in a 325°F oven for 15–20 minutes until heated through.
Frequently Asked Questions
Can I use other dried fruits instead of raisins?
Yes, you can! Dried cranberries, chopped dates, or even chopped dried figs can be used in place of raisins. Each will give a slightly different flavor and texture but still work well with the pie’s filling base. Just be sure to use the same quantity and cook them in the same way as the raisins.
Is it necessary to add vinegar to the filling?
The vinegar might seem like a surprising ingredient, but it plays an important role. It cuts through the sweetness of the filling and brings balance to the flavor. You won’t taste it in the final pie—it just adds a subtle tang that enhances the overall taste. If you don’t have vinegar, lemon juice is a great substitute.
Can I make this pie ahead of time?
Absolutely! This pie is a great make-ahead dessert. You can bake it a day in advance and store it at room temperature (covered), or refrigerate it for a few days. You can even freeze it for longer storage. Just bring it back to room temperature or reheat gently before serving.
Do I need to blind bake the pie crust?
No, blind baking is not necessary for this recipe. The filling is thick and doesn’t make the bottom crust soggy, especially if you let the filling cool slightly before pouring it into the crust. Just assemble the pie and bake it all at once.
Can I use homemade pie crust instead of store-bought?
Yes! Homemade crust works beautifully with this recipe. If you have a favorite recipe or prefer making it from scratch, go ahead. Just make sure you have enough dough for both the bottom and top crust.
How do I know when the pie is done baking?
The pie is ready when the crust is golden brown and you see some bubbling through the slits in the top. If you’re unsure, you can gently tap the top crust—it should feel firm and crisp. A bubbling filling means it has reached the right temperature and consistency inside.
Can I reduce the sugar in the filling?
You can slightly reduce the sugar if you prefer a less sweet pie. However, keep in mind that raisins are naturally sweet, so the brown sugar helps balance the tartness added by the vinegar. Cutting it too much may change the texture of the filling
Is this pie served warm or cold?
It can be served either way! Many people enjoy it warm with a scoop of vanilla ice cream. It’s also delicious at room temperature or chilled straight from the fridge. It really comes down to personal preference.
Can I make this pie gluten-free?
Yes, you can! Just use a gluten-free pie crust and make sure the cornstarch is certified gluten-free. The filling is naturally gluten-free, so it’s an easy swap for those with dietary restrictions.
Other Easy Raisin Recipes
Bran Muffins with Raisins – These wholesome bran muffins are soft, moist, and naturally sweetened with plump raisins for a healthy breakfast or snack.
Cookies with Applesauce and Raisins – Soft and chewy, these applesauce cookies are packed with juicy raisins and make a perfect guilt-free treat.
Sunflower Seed Kale Salad with Raisins – This crunchy kale salad is tossed with sunflower seeds and sweet raisins for a flavorful, nutrient-packed side dish.
Carrot Apple Salad with Raisins – A refreshing mix of shredded carrots, crisp apples, and raisins makes this salad a naturally sweet and tangy favorite.
Baked Apples with Raisins and Cinnamon – These tender baked apples are filled with warm cinnamon and juicy raisins for a cozy, no-added-sugar dessert.
Cottage Cheese Bowl with Walnuts and Raisins – Creamy cottage cheese topped with crunchy walnuts and sweet raisins makes a protein-rich, satisfying breakfast.
Quinoa Side Dish with Raisins – This fluffy quinoa is mixed with raisins for a lightly sweet and savory side that pairs well with any main dish.
Old Fashioned Raisin Pie
Want to save this recipe?
Ingredients
- 2 cups raisins
- 2 cups water
- ½ cup packed brown sugar
- 2 tbsp cornstarch
- ½ tsp ground cinnamon
- ¼ tsp salt
- 1 tbsp distilled white vinegar
- 1 tbsp butter
- 14.1 ounce double-crust pie pastry 1 package, thawed
Recommended Kitchen Tools (click the links below to see the items used to make this recipe)
- Saucepan
- Spoon or spatula
Instructions
- Preheat oven to 425°F. In a small saucepan, combine raisins and water. Bring to a boil, reduce heat, and simmer for 5 minutes.
- In a small bowl, mix brown sugar, cornstarch, cinnamon, and salt. Add the dry mixture to the hot raisins and cook, stirring constantly, until thickened and syrup is clear.
- Remove from heat and stir in vinegar and butter until melted and well combined. Let the filling cool slightly.
- Roll out one pie crust and place it into a 9-inch pie dish. Pour the raisin filling into the crust and spread evenly.
- Top with the second crust, seal the edges, and cut a few slits on top to vent steam.
- Bake for 30 to 35 minutes, or until the crust is golden brown. Cool slightly before serving.
Notes
- Letting the pie rest before slicing helps the filling firm up nicely.
- Serve warm with whipped cream or vanilla ice cream for a classic touch.


")