Butter Swim Biscuits – Fluffy, Golden & Incredibly Easy!
This post may contain affiliate links (disclosure).
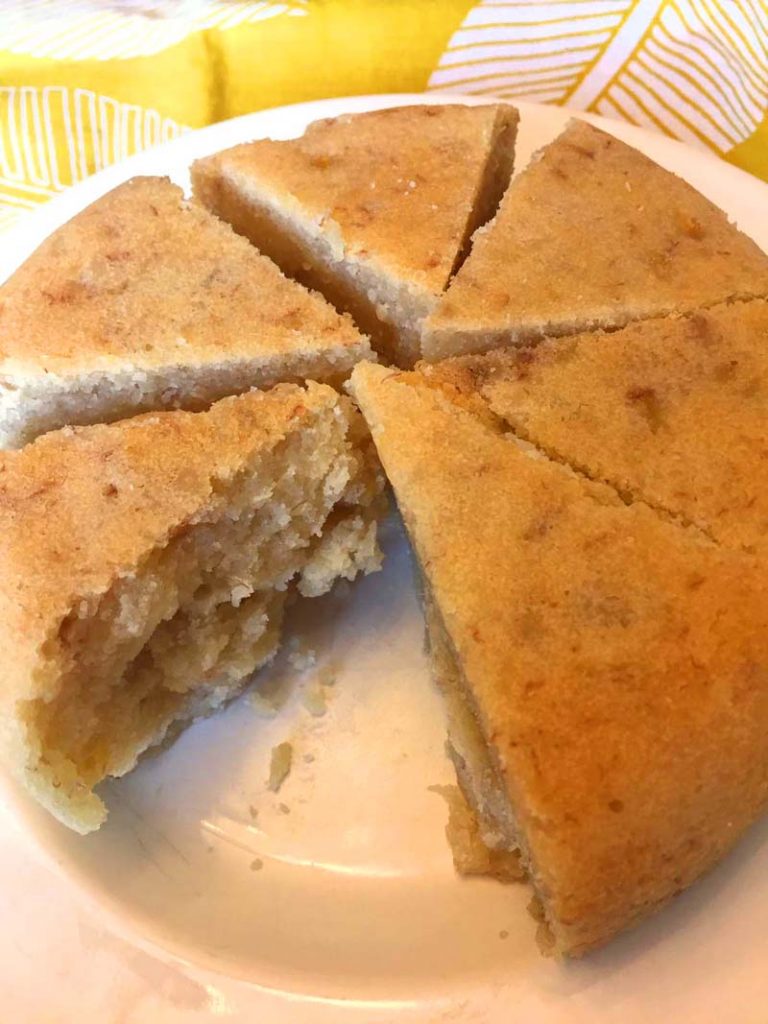
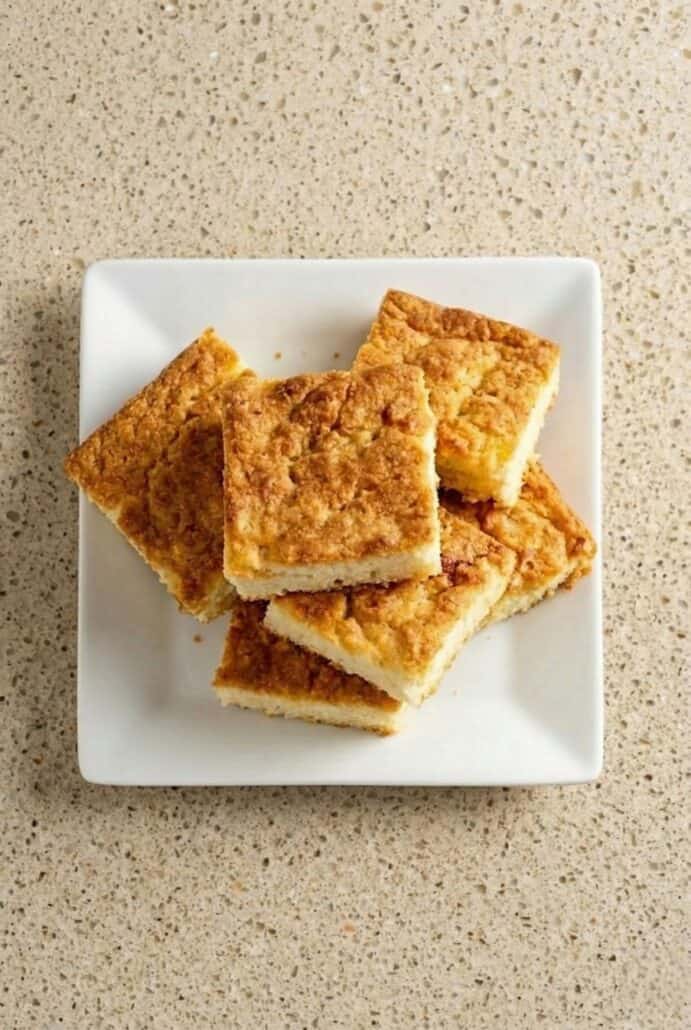
These Butter Swim Biscuits are the ultimate easy Southern biscuit recipe. They bake up golden brown on the outside and incredibly soft and fluffy on the inside. If you’re looking for a simple homemade biscuit recipe with minimal effort and maximum buttery flavor, this is the one you’ll want to make again and again.
Want to save this recipe?
Why You’ll Love Butter Swim Biscuits
-
These biscuits are incredibly buttery and rich. The dough literally bakes in melted butter, creating crispy golden edges and a soft, fluffy center. Every bite tastes indulgent and comforting. If you love classic Southern flavors, this recipe will absolutely hit the spot.
-
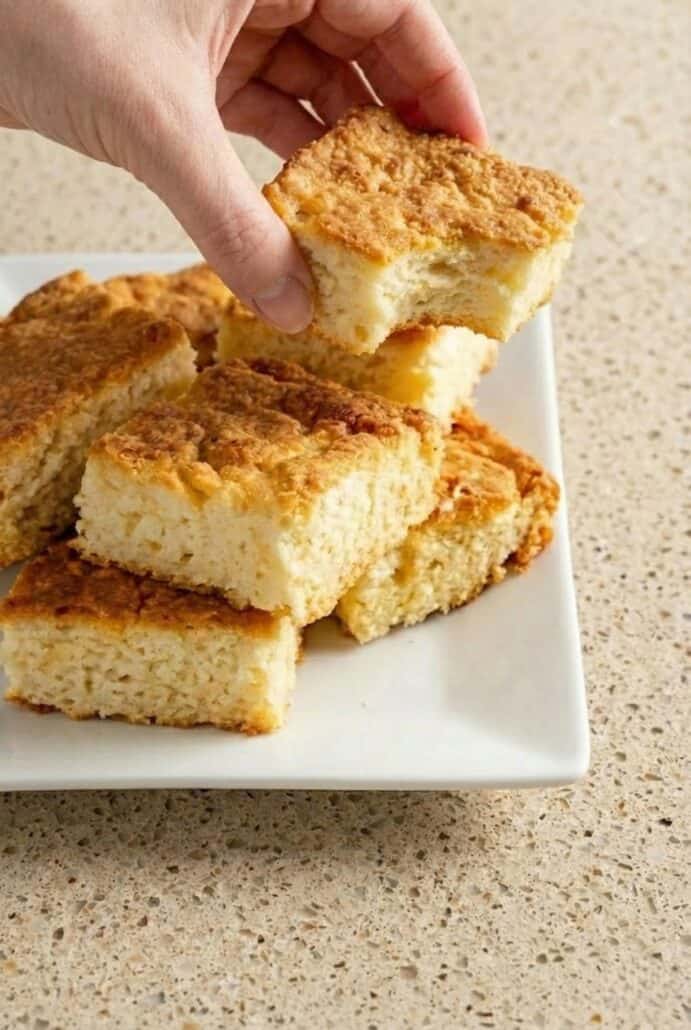
The texture is completely unique. The outside forms a lightly crisp crust while the inside stays tender and almost cake-like. They are tall, fluffy, and beautifully golden. It’s the perfect combination of crisp and soft in one biscuit.
-
This recipe is so easy to make. There’s no cutting cold butter into flour and no rolling or shaping individual biscuits. You simply mix the dough, pour it into the pan, and bake. It’s beginner-friendly and practically foolproof.
-
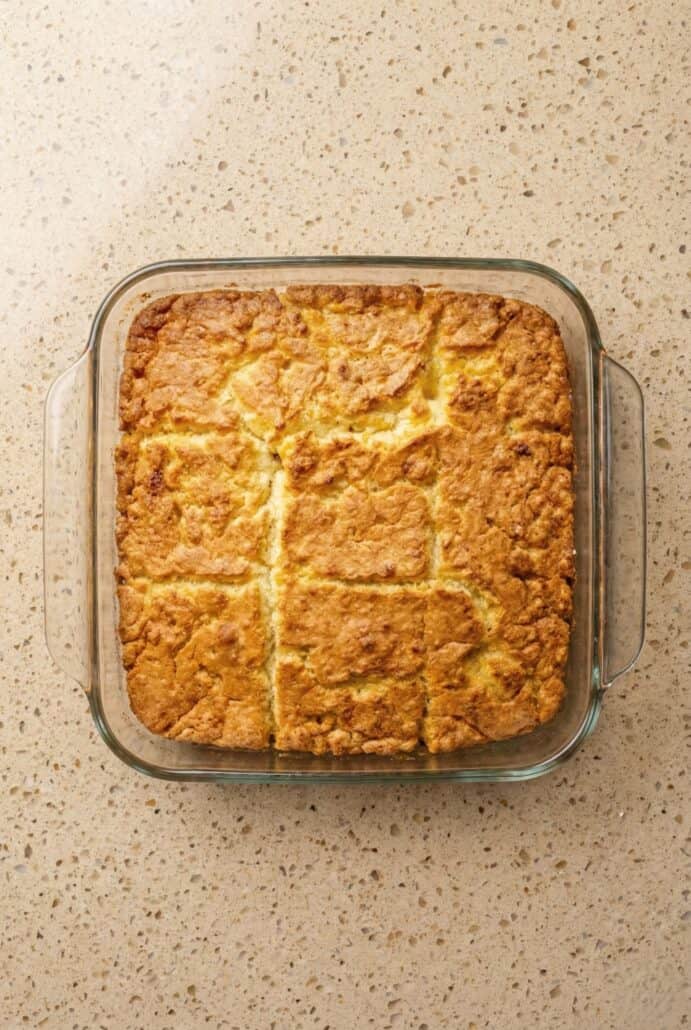
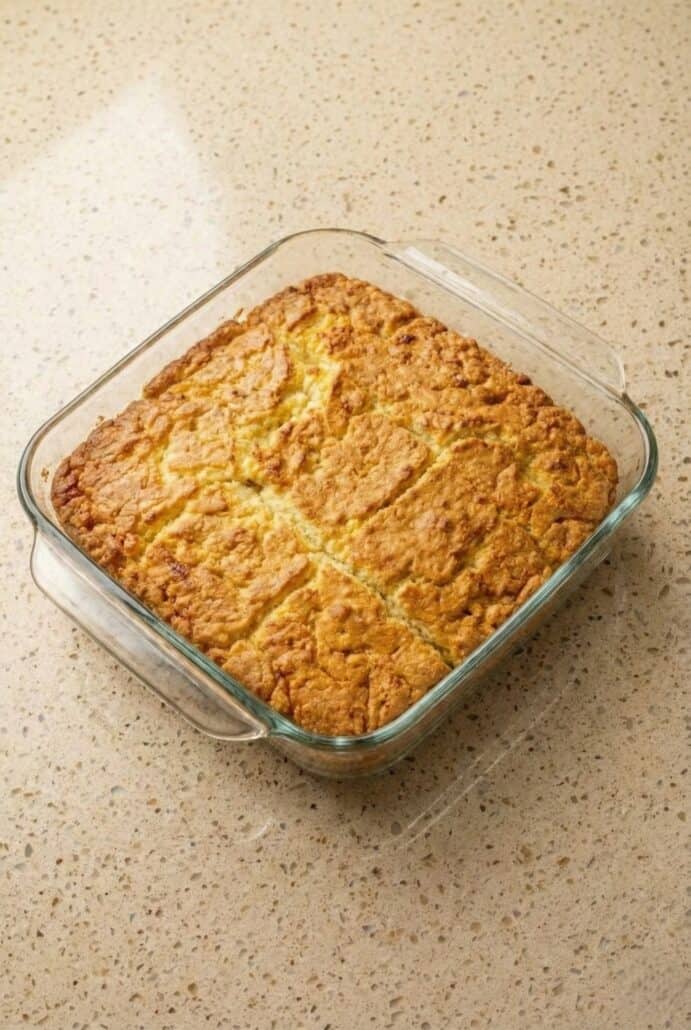
You get nine perfectly portioned biscuits in one pan. The dough is sliced before baking, making serving simple and neat. No pulling apart uneven biscuits. Just clean, bakery-style squares ready to enjoy.
-
They’re incredibly versatile. Serve them with honey or jam for breakfast. Pair them with sausage gravy for brunch. Or enjoy them alongside soup or stew for a cozy dinner side dish.
Ingredients For Butter Swim Biscuits
-
All-purpose flour – This forms the base of the biscuits and gives them structure while keeping the texture soft and tender.
-
Sugar – Adds a subtle touch of sweetness that balances the rich butter flavor without making the biscuits taste sweet.
-
Baking powder – Helps the biscuits rise and become tall and fluffy.
-
Baking soda – Works with the buttermilk to create extra lift and a light texture.
-
Kosher salt – Enhances all the flavors and balances the richness of the butter.
-
Buttermilk – Gives the biscuits a slight tang and keeps the dough moist and soft. It also reacts with the baking soda to help the biscuits rise.
-
Unsalted butter – Melts in the pan and creates those signature crispy, golden edges while soaking into the dough for incredible buttery flavor.
For the exact measurements of the ingredients, see the printable recipe card at the bottom of this article.
Kitchen Tools You Need To Make Butter Swim Biscuits
-
Large mixing bowl – You’ll need this to combine the dry ingredients and mix the dough together. Make sure it’s big enough to stir comfortably without spilling.
-
Whisk – Helps evenly blend the flour, baking powder, baking soda, sugar, and salt so everything is well distributed.
-
Rubber spatula or sturdy spoon – Perfect for mixing the buttermilk into the dry ingredients and spreading the dough evenly in the pan.
-
8-inch square baking dish – This holds the melted butter and dough while baking and helps create those crispy golden edges.
-
Measuring cups – Essential for accurately measuring the flour and buttermilk to ensure the right texture.
-
Measuring spoons – Used for the sugar, baking powder, baking soda, and salt so the biscuits rise properly.
-
Bench scraper or large knife – Used to cut the dough into squares before baking so the biscuits are easy to slice and serve.
-
Nonstick cooking spray – Helps prevent sticking when cutting the dough lines.
-
Oven – Bakes the biscuits until they are golden brown and perfectly fluffy inside.

How To Make Butter Swim Biscuits
-
Start by heating your oven so it’s fully preheated and ready for baking. A hot oven helps the biscuits rise properly and develop a golden top.
-
In a mixing bowl, combine all the dry ingredients and whisk them together so everything is evenly distributed. This step ensures the biscuits bake up light and fluffy.
-
Pour the buttermilk into the dry mixture and stir gently until a soft, wet dough forms. The batter will be looser than traditional biscuit dough, and that’s exactly what you want. Avoid overmixing so the biscuits stay tender.
-
Melt the butter directly in your baking dish in the oven. Once melted, carefully remove the dish and immediately add the dough on top of the butter.
-
Spread the dough out evenly to the edges of the pan. Don’t worry if butter rises up along the sides or over the top — that’s what creates the crispy crust.
-
Cut the unbaked dough into nine squares right in the pan. This makes it easy to serve once baked.
-
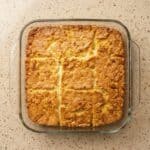
Bake until the top is beautifully golden brown and the edges look crisp. Let the biscuits rest briefly so the butter finishes soaking in before slicing and serving.
Serving Suggestions
-
Serve these warm with a drizzle of honey for a simple and delicious breakfast. The sweetness pairs perfectly with the rich buttery flavor.
-
Spread them with your homemade kiwi jam or fruit preserves. The soft, fluffy texture makes them perfect for soaking up every bit of flavor.
Want to save this recipe?
-
Spoon sausage gravy right over the top for a classic Southern-style meal. The crispy edges hold up beautifully under the creamy gravy.
-
Pair them with a bowl of hearty chickpea soup or chicken pot pie stew. They’re perfect for dipping and make any cozy dinner even better.
-
Add them to a brunch spread with fluffy scrambled eggs, crispy bacon, and fresh blueberries. They make the table look impressive with very little effort.
Tips For Success
-
Measure your flour correctly. Spoon the flour into the measuring cup and level it off instead of scooping directly from the bag. Too much flour can make the biscuits dense instead of soft and fluffy. Accurate measuring keeps the texture light and tender.
-
Don’t overmix the dough. Once you add the buttermilk, stir just until combined. The dough should look wet and slightly lumpy. Overmixing can develop too much gluten and make the biscuits tough instead of soft.
-
Make sure your oven is fully preheated. A hot oven helps the biscuits rise quickly and develop that beautiful golden top. If the oven isn’t hot enough, the texture may not be as fluffy. Always give your oven enough time to come to temperature.
-
Melt the butter completely before adding the dough. The butter should be fully liquid and hot when the batter goes in. This is what creates the signature crispy edges and rich flavor. The dough will “swim” in the butter as it bakes.
-
Spread the dough gently and evenly. Use a spatula to push it all the way to the edges of the pan. Don’t worry if butter pools around the top or sides. That’s exactly what you want for that golden crust.
-
Cut the dough before baking. Slicing it into squares ahead of time makes serving much easier later. It also helps guide where the biscuits will separate once baked. Even if the lines blur slightly, they will still bake up beautifully.
-
Let the biscuits rest after baking. Give them at least 5 minutes before serving. This allows the butter to finish absorbing into the biscuits. Cutting too early can make them fall apart.
-
Serve them fresh whenever possible. These biscuits taste best warm from the oven. The texture is at its peak the day they’re made.
Variations And Substitutions
-
If you don’t have buttermilk, you can substitute plain yogurt for a similar tangy flavor and thick consistency. Yogurt keeps the biscuits tender and moist. If you prefer a milder taste, you can use regular whole milk instead. When using milk, omit the baking soda and increase the baking powder to a total of 3 teaspoons to maintain proper rise.
-
If you only have salted butter on hand, you can absolutely use it. Simply reduce the added salt in the dough to 1/2 teaspoon so the biscuits don’t turn out too salty. This keeps the flavor balanced while still delivering that rich buttery taste.
-
If you use table salt instead of kosher salt, reduce the amount by half. Table salt is finer and more concentrated, so using the full amount could make the biscuits overly salty. Small adjustments like this help maintain perfect flavor.
-
For a slightly sweeter version, you can increase the sugar by an extra tablespoon. This works especially well if you plan to serve the biscuits with honey or jam. The subtle sweetness makes them taste almost like a breakfast treat.
-
You can also add mix-ins to change things up. Try stirring in shredded cheddar cheese for a savory twist. Fresh herbs like chopped chives or parsley can add a pop of flavor. Make sure any add-ins are evenly distributed but avoid overmixing.
-
For a richer texture, you can experiment with full-fat dairy options only. Lower-fat substitutes may slightly affect the final texture. Keeping the fat content similar helps maintain that soft, cake-like center.
Storage and Reheating
-
Allow the biscuits to cool completely before storing. This prevents condensation from forming, which can make them soggy.
-
Store leftovers in an airtight container at room temperature for up to 2 days. Keeping them sealed helps maintain their soft texture.
-
For longer storage, you can refrigerate them in an airtight container for up to 4 days. Just keep in mind that refrigeration may slightly firm up the texture.
-
To reheat, wrap the biscuits loosely in aluminum foil and warm them in a 350°F oven for 5 to 10 minutes. This helps restore their soft center while keeping the edges from over-browning.
-
You can also microwave individual biscuits for about 15 to 20 seconds if you’re in a hurry. However, the oven method gives the best texture.
-
If reheating from the refrigerator, allow the biscuits to sit at room temperature for a few minutes before warming for more even heating.
Frequently Asked Questions
Why are they called Butter Swim Biscuits?
They are called Butter Swim Biscuits because the dough is baked directly in melted butter. Instead of cutting cold butter into the flour like traditional biscuits, the butter melts in the baking dish first. The soft dough is then spread right on top of the melted butter. As the biscuits bake, they literally “swim” in the butter, creating crispy edges and a rich, buttery flavor throughout.
Why is the dough so wet compared to regular biscuit dough?
This dough is intentionally much wetter than traditional biscuit dough. Classic biscuits are usually rolled and cut, which requires a firmer texture. Butter Swim Biscuits are designed to be spreadable and baked as one large slab. The looser dough helps create that soft, fluffy, cake-like interior that makes this recipe unique.
Can I make these biscuits without buttermilk?
Yes, you can make substitutions if needed. Plain yogurt works well and keeps the texture tender while adding a slight tang. You can also use whole milk for a milder flavor. If using milk instead of buttermilk, omit the baking soda and increase the baking powder to a total of 3 teaspoons to ensure the biscuits rise properly.
Why do I cut the dough before baking?
Cutting the dough into squares before baking helps guide the portions and makes serving much easier. Even though the dough is wet and the lines may blur slightly during baking, they will still create natural separations. This method allows you to get nine evenly sized biscuits without having to shape them individually. It’s one of the reasons this recipe is so simple and beginner-friendly.
Why are my biscuits not golden brown on top?
If your biscuits are not browning properly, your oven temperature may be slightly off. Make sure your oven is fully preheated before baking. The high temperature helps create that golden crust. Also, placing the dish in the center of the oven promotes even browning.
Can I double this recipe?
Yes, you can double the recipe if you need to serve more people. Simply use a larger baking dish so the dough is not too thick. Keep an eye on the baking time, as a larger batch may need a few extra minutes in the oven. The biscuits are done when the top is golden brown and the edges begin to pull away from the sides of the pan.
How do I know when the biscuits are fully baked?
The biscuits are ready when the top is a deep golden brown and the edges look crisp. You may still see some butter bubbling around the sides, which is completely normal. The center should feel set and no longer look wet. Letting them rest for at least 5 minutes after baking allows the butter to absorb fully and the texture to finish setting.
Other Easy Biscuit Recipes
Cheddar Biscuits – Soft, fluffy biscuits loaded with savory cheddar cheese and baked until golden brown with irresistible cheesy flavor in every bite.
Air Fryer Glazed Donuts From Canned Biscuits – Quick and easy donuts made in the air fryer, coated in a sweet vanilla glaze for a warm, bakery-style treat at home.
Almond Flour Biscuits – Low carb, gluten-free biscuits made with almond flour that are tender, buttery, and perfect for keto-friendly meals.
Cheddar Bay Style Biscuits – Buttery garlic cheddar biscuits inspired by the famous restaurant favorite, with a soft inside and flavorful golden crust.
Canned Biscuits in the Air Fryer – Store-bought refrigerated biscuits cooked in the air fryer for perfectly fluffy centers and crisp golden exteriors in minutes.
Air Fryer Cinnamon Sugar Donut Holes – Bite-sized biscuit dough pieces air fried until golden and tossed in sweet cinnamon sugar for an easy homemade dessert.
Pillsbury Grands Biscuits in the Air Fryer – Thick and fluffy Pillsbury Grands biscuits cooked in the air fryer for a quick, no-fuss breakfast or side dish.
Butter Swim Biscuits
Want to save this recipe?
Ingredients
- 2 1/2 cup all-purpose flour
- 1 tbsp sugar
- 2 tsp baking powder
- 1 tsp baking soda
- 1 tsp kosher salt
- 2 cups buttermilk shaken
- 8 tbsp butter 1/2 cup, unsalted
Recommended Kitchen Tools (click the links below to see the items used to make this recipe)
- Bowl large
- Rubber spatula or spoon
- Square baking dish 8-inch
- Bench scraper or large knife
- Nonstick Cooking Spray
Instructions
- Preheat your oven to 450°F.
- In a large bowl, whisk together the flour, sugar, baking powder, baking soda, and salt.
- Pour in the buttermilk and stir until a wet, pourable dough forms. Do not overmix. A few small lumps are perfectly fine. Let the dough rest for 5 minutes.
- Place the butter in an 8-inch square baking dish. Put the dish in the oven for about 3 to 5 minutes, or until the butter is fully melted. Remove from the oven.
- Spoon the biscuit dough directly into the melted butter. Gently spread it out evenly to the edges of the pan using a spatula. Some butter may rise over the top, and that’s completely fine.
- Lightly spray a bench scraper or large knife with nonstick cooking spray. Cut the dough into 9 squares by making two vertical and two horizontal cuts. Spray again if needed and go over the lines once more.
- Bake for 20 to 25 minutes, rotating the pan halfway through baking. The biscuits are ready when the top is golden brown and the edges begin to pull away from the sides of the pan.
- Let the biscuits rest for at least 5 minutes before serving so the butter can fully absorb. Slice along the pre-cut lines and enjoy.
Notes
- If using salted butter, reduce the salt in the dough to 1/2 teaspoon.
- These biscuits are best enjoyed fresh the same day they are baked.


")