All Natural Sweet Pie Crust Dough Recipe Using The Food Processor
This post may contain affiliate links (disclosure).
Making your own pie crust dough is so easy that I don’t see the point of store-bought pie crusts. With the food processor, turning the ingredients into dough takes just a few seconds!
This sweet pie crust dough recipe uses all natural ingredients that are found in a pantry and freezer – flour, butter, sugar and salt. This pie crust has no vegetable shortening and no trans fats!
Why You’ll Love This Easy Pie Crust Dough Recipe Using the Food Processor:
- Effortless and Quick: This pie crust recipe saves you time by using a food processor, allowing you to prepare the dough in just minutes. You don’t need to worry about tedious manual mixing or kneading. The food processor ensures the butter is perfectly incorporated, giving you a consistent, flaky crust every time. Plus, the simplicity of the process makes it an ideal recipe for both beginners and experienced bakers alike.
- Perfectly Flaky Texture: Achieving that perfect flaky texture in your pie crust is often challenging, but this recipe makes it easy. The food processor method evenly distributes the butter throughout the dough, which is crucial for creating those desirable flaky layers. Whether you’re making a sweet or savory pie, this crust will elevate your dish with its light, tender texture. The results are consistently impressive, making it a go-to recipe for any pie lover.
- Versatile and Adaptable: This pie crust dough is incredibly versatile, working well for a variety of pie types—from fruit-filled desserts to hearty meat pies. You can easily adapt it to different flavors or pie fillings, making it a staple recipe in your kitchen. The dough is also easy to roll out and shape, allowing you to get creative with your pie designs.
- Minimal Ingredients: With just a few simple ingredients—flour, butter, salt, and water—you can create a delicious homemade pie crust. These pantry staples are often on hand, making this recipe convenient for when you need a pie crust in a pinch. There’s no need for any special ingredients, and you can feel good knowing exactly what’s in your pie crust.
- Consistent Results Every Time: One of the best aspects of this recipe is its reliability. The food processor ensures that the dough is mixed just the right amount, avoiding the risk of overworking the dough, which can lead to a tough crust. This method helps you achieve consistent results every time, so you can bake with confidence knowing your pie crust will turn out perfectly.
All Natural Sweet Pie Crust Dough Recipe Using The Food Processor
Preparation time: 5 minute(s)
Ingredients
- 2 1/2 cups flour: The base of the dough, giving structure and texture to your pie crust.
- 1 tsp salt: Enhances flavor and balances the sweetness in the dough.
- 2 tbsp sugar: Adds a touch of sweetness and helps with browning.
- 2 1/2 sticks butter: Provides richness and creates a flaky, tender texture.
- 7 tbsp cold water: Brings the dough together, keeping it pliable while ensuring a light, flaky crust.
Kitchen Tools You Need To Make Easy Pie Crust Dough
- Food Processor: Quickly mixes the ingredients and ensures the butter is evenly distributed for a flaky crust.
- Measuring Cups: Essential for accurately measuring the flour, butter, and other ingredients to achieve the perfect dough consistency.
- Measuring Spoons: Helps you precisely measure small quantities like salt and sugar to ensure balanced flavors.
- Rolling Pin: Rolls out the dough evenly to the desired thickness, making it easy to fit into your pie dish.
- Plastic Wrap: Wraps the dough for chilling, which helps it firm up and makes it easier to roll out later.
- Pie Dish: The vessel where your pie will bake; this recipe works for various sizes and shapes.
- Pastry Cutter (optional): An alternative to the food processor, useful for cutting butter into the flour if you’re mixing by hand.
How To Make Pie Crust Dough In A Food Processor
Cut the butter into 1/4-inch pieces.
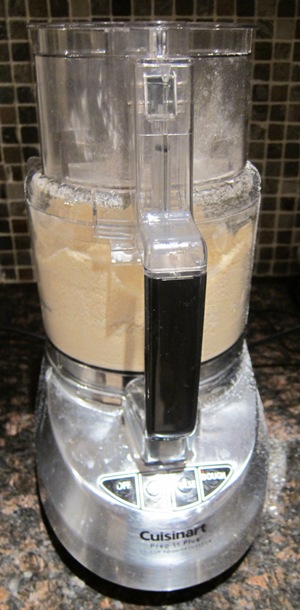
Put flour, salt and sugar in the food processor fitted with a steel blade inside the bowl. Pulse 3 times. Add butter pieces to the food processor bowl. Process until the butter is incorporated into flour and the mixture resembles coarse sand. Add the cold water to the food processor and pulse 5 times.
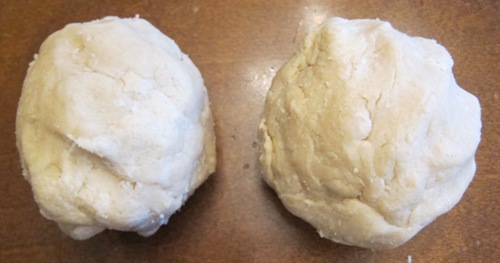
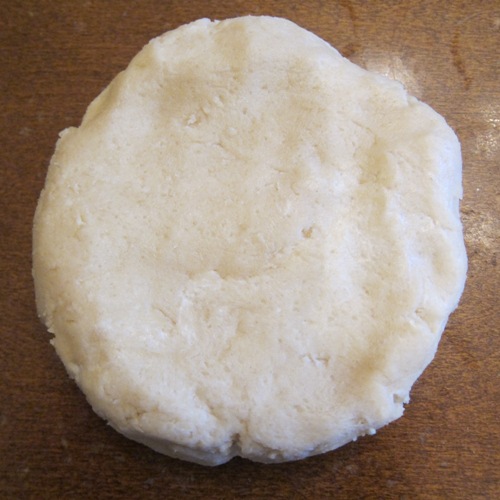
Remove the dough from the food processor onto a counter. Divide the dough into 2 parts, and shape into 2 balls. Press down on each ball to shape it into a 4-inch-wide disk. You should now have 2 disks – one will be for the bottom pie crust and the other for the top pie crust.
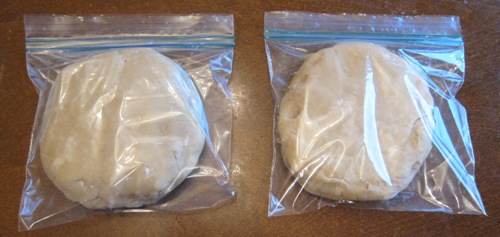
Put the dough disks into ziploc bags and refrigerate for at least 30 minutes, or for up to 3 days.
Picture of the 2 pie dough balls:
Picture of the pie dough disk:
Picture of the pie dough disks in ziploc bags, ready to go to the refrigerator:
Serving Suggestions
- Classic Apple Pie: Pair this pie crust with a cinnamon-spiced apple filling and top it with a lattice crust for a traditional and comforting dessert.
- Savory Quiche: Use this dough to create a quiche filled with eggs, cheese, and a mix of vegetables or meats. It’s perfect for brunch or a light dinner.
- Fruit Tart: Blind bake the crust and then fill it with pastry cream, topping it off with fresh, vibrant berries or other seasonal fruits for an elegant dessert.
- Mini Hand Pies or Turnovers: Roll out the dough, cut into circles, and fill with sweet or savory fillings. These make excellent snacks or portable treats.
- Custard Pies: Use this dough as the base for creamy custard pies like pumpkin, sweet potato, or buttermilk pie, offering a rich and smooth texture in every bite.
Tips For Success
Achieving a perfect pie crust is easier than you might think, especially when using a food processor. However, there are some key tips that will help ensure your pie crust turns out perfectly flaky and delicious every time.
- Use Cold Ingredients: The key to a flaky pie crust is keeping everything cold, especially the butter. Cold butter creates pockets of steam as the pie bakes, which leads to those beautiful, flaky layers. Make sure your butter is chilled and even consider chilling your flour and food processor bowl before starting. If your kitchen is warm, you can also chill your dough between steps to keep the butter from softening too much.
- Don’t Overmix the Dough: When using a food processor, it’s easy to overmix the dough, which can lead to a tough crust. Pulse the ingredients just until the mixture resembles coarse crumbs with pea-sized butter pieces. The dough should start to come together when you pinch it between your fingers, but it shouldn’t be a smooth ball in the food processor. This ensures that the butter remains in small chunks, which creates a tender, flaky texture.
- Add Water Gradually: The amount of water needed can vary depending on factors like humidity and the brand of flour used. Start by adding the minimum amount of water and add more only if needed. The dough should hold together when pressed, but it should not be sticky or overly wet. If you add too much water, the dough can become tough and lose its flakiness.
- Chill the Dough: After forming your dough into a disk, wrap it in plastic wrap and chill it in the refrigerator for at least 30 minutes before rolling it out. This step helps relax the gluten in the dough, making it easier to roll out and less likely to shrink during baking. It also firms up the butter, which helps maintain those flaky layers.
- Roll the Dough Evenly: When rolling out the dough, try to work quickly to keep it from warming up. Roll from the center outwards, rotating the dough occasionally to maintain an even thickness. Lightly flour your work surface and rolling pin to prevent sticking, but avoid adding too much flour, as this can make the dough dry. If the dough starts to crack at the edges, you can gently press it back together.
- Blind Baking for Certain Pies: If you’re making a pie with a filling that doesn’t require much baking, like a custard or cream pie, you may need to blind bake the crust. To do this, line the rolled-out dough with parchment paper and fill it with pie weights or dried beans. This helps prevent the crust from puffing up. Bake until the edges are golden, then remove the weights and continue baking until the bottom is fully cooked.
- Preventing Shrinkage: To avoid your pie crust shrinking during baking, make sure the dough is well-chilled before it goes into the oven. You can also gently press the dough against the sides of the pie dish to secure it. If your crust still tends to shrink, try using a metal or glass pie dish, as they conduct heat more evenly than ceramic ones.
Following these tips will help you achieve a consistently perfect pie crust every time. Whether you’re a beginner or an experienced baker, these strategies will make the process easier and more successful.
Variations and Substitutions
This versatile pie crust recipe can be easily adapted to suit a variety of dietary preferences and flavor profiles. Here are some ideas to help you customize the dough to your liking:
- Gluten-Free Option: To make a gluten-free pie crust, you can substitute the all-purpose flour with a gluten-free flour blend. Look for a blend that includes xanthan gum or add a small amount yourself to help bind the dough together. Keep in mind that gluten-free doughs can be a bit more delicate, so you may need to handle the dough more gently and possibly roll it out between two sheets of parchment paper to prevent sticking.
- Whole Wheat Crust: For a healthier, whole-grain version, you can replace part or all of the all-purpose flour with whole wheat flour. Using whole wheat flour will give your crust a nuttier flavor and a slightly denser texture. If you prefer a lighter crust, consider using half whole wheat and half all-purpose flour. You may need to add a bit more water to the dough, as whole wheat flour tends to absorb more liquid.
- Dairy-Free/Vegan Crust: If you need a dairy-free or vegan option, substitute the butter with a plant-based butter or solid coconut oil. When using coconut oil, make sure it’s chilled and solid before incorporating it into the flour, just as you would with butter. Coconut oil can add a subtle coconut flavor to the crust, which pairs nicely with tropical or fruity pie fillings. Alternatively, some vegan margarine brands work well and mimic the buttery flavor more closely.
- Low-Sugar or No-Sugar Crust: If you’re looking to reduce sugar in your diet, you can easily omit the sugar from the recipe without affecting the structure of the crust. This is particularly useful if you’re making a savory pie, such as a quiche or a pot pie, where a slightly savory crust is preferred. If you still want a touch of sweetness but less than the original recipe, try reducing the sugar to just 1 tablespoon.
- Flavor Infusions: You can customize the flavor of your pie crust by adding herbs, spices, or other flavorings to the dough. For a savory pie, try mixing in a teaspoon of dried herbs like rosemary or thyme, or adding a pinch of garlic powder for extra depth. For a dessert pie, consider incorporating a bit of cinnamon, nutmeg, or even citrus zest into the dough for a unique twist. These small additions can make your pie crust stand out and complement the filling.
- Nut-Based Crust: For a nutty variation, you can incorporate finely ground nuts into the dough. Replace about 1/4 cup of the flour with almond flour, ground walnuts, or pecans. This will add a rich, nutty flavor and slightly different texture to the crust, making it perfect for pairing with chocolate or fruit fillings. Be aware that nut-based crusts may brown faster, so you might need to adjust your baking time accordingly.
- Oil-Based Crust: If you prefer not to use butter or margarine, you can make a crust using vegetable oil. This type of crust tends to be more crumbly and less flaky than a butter-based crust, but it can still be delicious, especially in savory pies. Mix the oil directly into the flour mixture, then add water until the dough comes together. This method is quick and easy, and it can be a great option for those who want to avoid solid fats.
These variations and substitutions allow you to tailor the pie crust recipe to your dietary needs and flavor preferences, making it a versatile base for all your pie-making adventures.
Storage and Reheating
Proper storage and reheating of your pie crust are essential to maintaining its flaky texture and delicious flavor. Here’s how you can store and reheat the dough or baked pie crust:
- Storing the Dough: If you’re not using the pie dough immediately, you can store it in the refrigerator for up to 2 days. After forming the dough into a disk, wrap it tightly in plastic wrap to prevent it from drying out. For longer storage, you can freeze the dough for up to 3 months. To freeze, wrap the dough disk in plastic wrap and then place it in a freezer-safe bag or airtight container. When you’re ready to use it, thaw the dough in the refrigerator overnight before rolling it out.
- Storing Baked Pie Crust: If you’ve already baked the pie crust, let it cool completely before storing it. A fully baked pie crust can be stored at room temperature for up to 2 days. To keep it fresh, cover the crust loosely with aluminum foil or plastic wrap. If you need to store it longer, you can freeze the baked crust for up to 1 month. Wrap the cooled crust in plastic wrap and then place it in a freezer-safe bag. Thaw the crust at room temperature before filling and serving.
- Reheating Baked Pie Crust: To reheat a fully baked pie crust, place it in a preheated 350°F oven for about 10 minutes, or until it’s warmed through and crisp. This is especially useful if you’re using the crust for a no-bake filling, as it helps refresh the texture. If you’re reheating a pie with filling, cover the edges of the crust with aluminum foil to prevent them from over-browning while the filling heats up.
- Storing Filled Pies: Once your pie is baked and filled, it’s best stored in the refrigerator, especially if it contains perishable ingredients like dairy, eggs, or fresh fruit. Cover the pie loosely with plastic wrap or aluminum foil and refrigerate for up to 4 days. For longer storage, you can freeze most types of pies for up to 2 months. Wrap the entire pie, or individual slices, in plastic wrap and then in a layer of aluminum foil to prevent freezer burn. Thaw the pie in the refrigerator before reheating.
- Reheating Filled Pies: To reheat a pie that’s been filled and baked, preheat your oven to 350°F. Place the pie on a baking sheet and cover it loosely with foil to prevent over-browning. Heat the pie for 15-20 minutes, or until warmed through. If reheating a frozen pie, extend the baking time by about 10-15 minutes. For individual slices, you can reheat them in the microwave for about 30 seconds to 1 minute, though the crust may not stay as crisp as when reheated in the oven.
By following these storage and reheating instructions, you can enjoy your pie crust and pies at their best, whether freshly baked or enjoyed later.
Frequently Asked Questions
Can I make this pie crust without a food processor?
Yes, you can make this pie crust without a food processor! While a food processor makes the process quicker and ensures the butter is evenly distributed, you can achieve similar results by using a pastry cutter or even your hands. To do this, combine the flour, salt, and sugar in a large mixing bowl. Add the cold, cubed butter, and use a pastry cutter or two knives to cut the butter into the flour mixture until it resembles coarse crumbs with pea-sized butter pieces. If using your hands, work quickly to rub the butter into the flour to prevent it from melting. Then, gradually add the ice water, mixing until the dough comes together. This method requires a bit more effort but will still result in a delicious, flaky pie crust.
Why is my pie crust tough instead of flaky?
A tough pie crust is often the result of overworking the dough or adding too much water. When making pie dough, it’s crucial to handle it as little as possible once the water is added. Overmixing develops the gluten in the flour, which can lead to a tougher texture. Additionally, if too much water is added, the dough can become sticky, requiring more flour when rolling out, which also contributes to toughness. To avoid this, stop mixing the dough as soon as it starts to come together, and be careful when adding water—only add enough to allow the dough to hold together when pressed.
Can I freeze the pie dough, and how should I thaw it?
Yes, you can freeze pie dough for future use. To freeze, wrap the dough tightly in plastic wrap, and then place it in a freezer-safe bag or airtight container. It can be frozen for up to 3 months. When you’re ready to use it, transfer the dough to the refrigerator and let it thaw overnight. Avoid thawing the dough at room temperature, as this can cause the butter to soften too much, making the dough difficult to handle and potentially affecting the final texture of your crust. Once thawed, allow the dough to sit at room temperature for a few minutes if it’s too firm to roll out.
Why does my pie crust shrink during baking?
Pie crust shrinkage is a common issue and can be caused by several factors. One of the main reasons is overworking the dough, which develops too much gluten, making the dough elastic and prone to shrinking as it bakes. Another reason could be that the dough wasn’t chilled long enough before baking. Chilling the dough helps it relax, preventing shrinkage. Additionally, using too much water or flour during the rolling process can also cause shrinkage. To prevent this, make sure to chill the dough thoroughly, avoid overmixing, and handle the dough gently when rolling it out.
Can I make a double-crust pie with this recipe?
Yes, this recipe can be easily doubled to make a double-crust pie. Simply double all of the ingredients, prepare the dough as directed, and then divide it into two equal portions—one for the bottom crust and one for the top. You can roll out the first portion for the bottom crust, fill your pie, and then roll out the second portion to cover the top. Be sure to trim any excess dough and crimp the edges to seal the pie. Don’t forget to cut slits in the top crust to allow steam to escape during baking.
What should I do if my dough cracks when rolling it out?
Cracks in the dough can occur if the dough is too cold or hasn’t been kneaded enough to bring it together smoothly. If your dough cracks, allow it to sit at room temperature for a few minutes to soften slightly. You can also use your hands to gently press any cracks back together as you roll. If the dough continues to crack, it might need a little more water. You can lightly mist the dough with water or gently knead in a teaspoon of water to help bring it together.
Can I use this pie crust recipe for savory pies?
Absolutely! This pie crust recipe is very versatile and works well for both sweet and savory pies. If you’re making a savory pie, such as a quiche or pot pie, you might consider omitting the sugar or reducing it slightly. You can also add herbs or spices to the dough to complement your savory filling. For instance, adding a teaspoon of dried thyme or rosemary can enhance the flavor of a savory pie crust and pair nicely with the filling.
How do I blind bake this pie crust?
Blind baking is the process of baking a pie crust without the filling, which is necessary for pies with no-bake fillings or when the filling has a shorter bake time than the crust. To blind bake this crust, first roll out the dough and fit it into your pie dish. Chill the crust in the refrigerator for at least 30 minutes to help prevent shrinkage. Line the crust with parchment paper or aluminum foil, and fill it with pie weights or dried beans to keep the crust from puffing up. Bake in a preheated oven at 375°F (190°C) for 15-20 minutes, or until the edges are lightly golden. Remove the weights and parchment, then bake for an additional 5-10 minutes until the bottom is fully baked.
Can I make this dough in advance?
Yes, this dough can be made ahead of time and stored in the refrigerator or freezer. In the refrigerator, the dough will keep for up to 2 days, wrapped tightly in plastic wrap. In the freezer, it can last for up to 3 months. Making the dough ahead of time can be a real time-saver, especially during the holidays or when preparing for a special occasion. Just make sure to allow enough time for the dough to thaw in the refrigerator if frozen, and bring it to a workable temperature before rolling it out.
Explore This Pie Recipe
No-Fail Graham Cracker Crust Recipe: quick, easy, and perfect for any pie or cheesecake. Made with just three ingredients, this crust is sweet, buttery, and provides the perfect base for your favorite fillings.
Classic Pecan Pie Without Corn Syrup: Enjoy the rich, nutty flavor of pecan pie without the corn syrup. This Classic Pecan Pie recipe uses natural sweeteners for a deliciously gooey filling and the perfect holiday dessert.
Smoky BBQ Beef Shepherd’s Pie: puts a flavorful twist on a classic comfort dish. Topped with creamy mashed potatoes, the tender beef filling is infused with a smoky BBQ sauce, making it a hearty and satisfying meal.
Quick Pumpkin Pie with Sweetened Condensed Milk: Sweetened Condensed Milk is creamy, perfectly spiced, and incredibly easy to make. It’s the perfect dessert for Thanksgiving or any fall gathering.
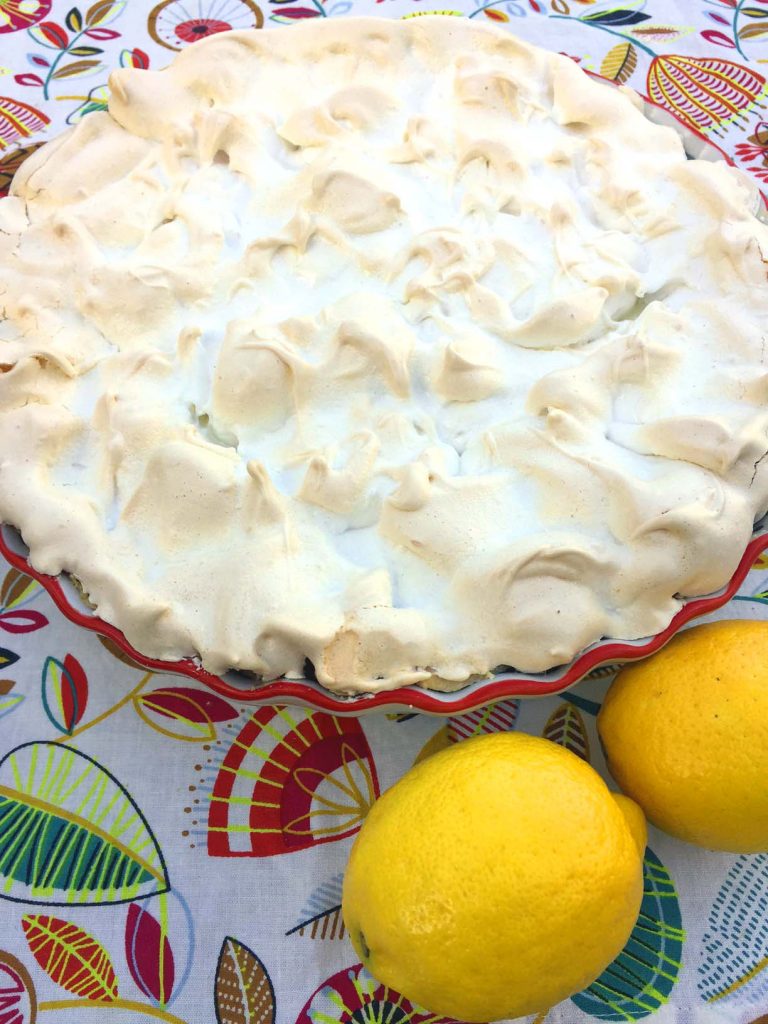
Ultimate Lemon Meringue Pie: A Step-By-Step Guide: tart, sweet, and topped with a cloud of fluffy meringue. Follow this step-by-step guide to create a show-stopping dessert that’s sure to impress.
Classic Homemade Apple Pie: Discover the secret to the best homemade apple pie with this easy, from-scratch recipe. Packed with spiced apples and encased in a flaky, buttery crust, this pie is a true classic.
Step-By-Step Guide to the Perfect Apple Pie: Learn how to make the perfect apple pie from scratch with this detailed step-by-step guide. With a flaky crust and a tender, spiced apple filling, this pie is sure to be a hit at any gathering.
All Natural Sweet Pie Crust Dough Recipe Using The Food Processor
Ingredients
- 2 1/2 cups all-purpose flour
- 1 tsp salt
- 2 tbsp sugar
- 2 1/2 stick unsalted butter chilled and cut into small cubes
- 7 tbsp cold water
Recommended Kitchen Tools (click the links below to see the items used to make this recipe)
- 1 Plastic Wrap
- 1 Pie Dish
- 1 Pastry Cutter optional
Instructions
- Prepare the Dry Ingredients: In the bowl of your food processor, combine the flour and salt. Pulse a few times to mix.
- Add the Butter: Add the chilled butter cubes to the flour mixture. Pulse until the mixture resembles coarse crumbs with pea-sized butter pieces.
- Incorporate Water: Gradually add ice water, one tablespoon at a time, pulsing briefly after each addition. Stop adding water when the dough begins to clump together, but isn’t wet or sticky.
- Form the Dough: Turn the dough out onto a clean surface. Gather it into a ball and flatten it into a disk. Wrap the dough disk in plastic wrap and refrigerate for at least 30 minutes, or up to 2 days, if not using immediately.
- Roll Out the Dough: When ready to use, remove the dough from the fridge and let it sit for a few minutes to soften slightly. On a lightly floured surface, roll out the dough to fit your pie dish. Carefully transfer the rolled
Notes
- If you don’t have a food processor, you can use a pastry cutter or your hands to incorporate the butter into the flour.
- For a sweeter pie crust, you can add 1 tablespoon of sugar to the dry ingredients.
- To ensure your pie crust doesn’t shrink during baking, chill the rolled-out dough in the pie dish for 15-20 minutes before baking.
Nutrition
See Also:
- Crispy Air Fryer Pizza from Scratch
- Air Fryer Biscuit Dough Donut Holes
- Quick Air Fryer Chocolate Chip Cookies


I am amazed that you haven’t used any vegetable shortening. I make pie crust at home too using the food processor but use the shortening. I will have to try it making it your way next time.
I must get myself a food processor! I can’t believe I’ve survived so long without one!
I like to use food processor to make pie crust too.
This recipe looks good….
I strongly believe one can never have too many pie crust recipe…
Love yours…
I love this step-by-step. I do make my own crust…EXACTLY how you do EXCEPT I add one teaspoon of either red or white wine vinegar. A chef once told me this prevents gluten from forming and then it’s flakier. Thank you so much for stopping by my blog today. I will enjoy perusing yours more!
Perfect pie crust; this is the way I make it except I use 1/2 shortening. I have been making for years.
great crust for a perfect pie
Looks like a wonderful crust!
This sounds like a great way to make a crust. I have never used a food processor for making pie crust, I guess I will have to try it.
Love the food processor. Its so handy for those tedious jobs.
I see others have mentioned the shortening. I, also don’t use it. I think, it makes the crust flakier. All, I know is that I also use the food processor with no shortening and it works. I am glad to get affirmation from your recipe.
I’ve never made pastry, ever! Once I get a food processor, I should try this. Methinks the VitaMix would pulverise the ingredients too much :P
A food processor definitely makes homemade pie crust so easy peasy to make! Your crust sounds delicious!
Great recipe — i’ve been looking for a pie crust recipe that uses a food processor for a while now. Thanks for sharing :)
never made a pie crust before :)
Looks really similar to the recipe I use…yummy!!!
You make it sound so easy! I’ll have to try it.
Feels guilty – I’ve never made pie crust dough before. Baking is something I need to work on. I love that you make it sound so easy and even I feel like I can do it myself. ;-)
I just made 2 crusts this afternoon by your recipe (used 1, froze 1). It is *delicious*!! And it was SO easy–thanks so much for a great recipe!
Thanks Alice! I’m really happy that you liked my recipe!
Melanie
I love making pie crust in my food processor because its so fast. I often make homemade pop-tarts for the kids with the crust which are always a big hit.
Hi Melanie!
I’m trying to make homemade chicken pot pie crust. Will the ingredients that you use for your crust be the same but without the sugar?
Thank you
Mae
Does this pie pastry recipe use salted or unsalted butter. I am always confused about this.
Unsalted