Homemade Apple Cider Recipe (Warm, Spiced & So Cozy!)
This post may contain affiliate links (disclosure).
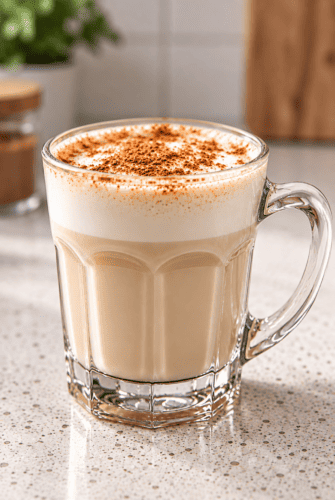
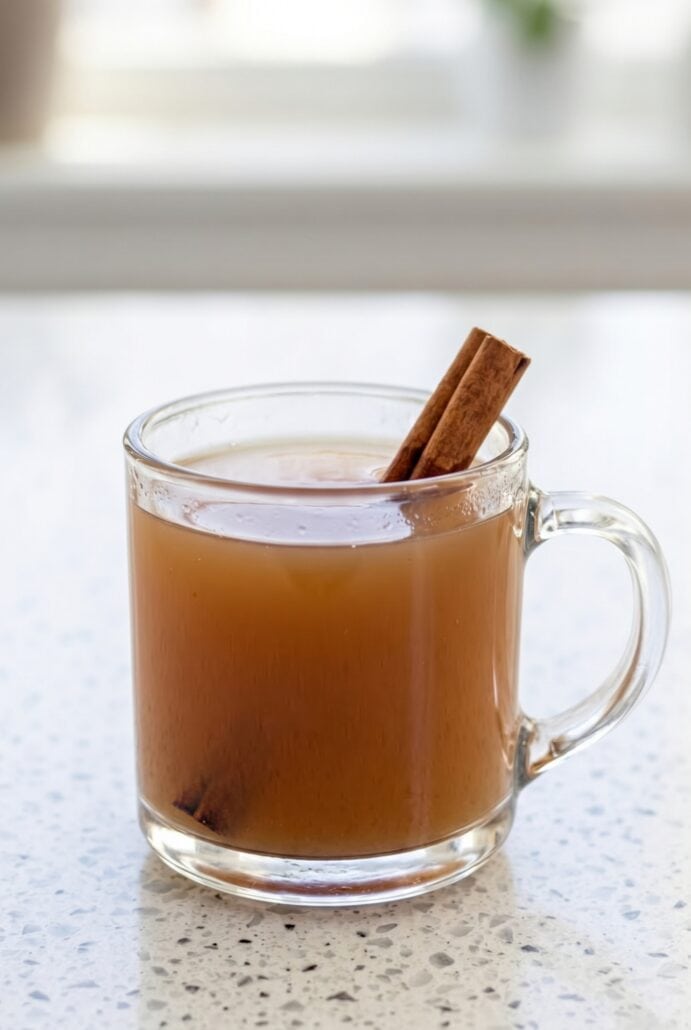
This homemade apple cider is the perfect cozy drink for a crisp fall day or chilly winter evening! Made from fresh apples, brown sugar, cinnamon, and allspice, this easy stovetop apple cider is filled with sweet apple flavor and warm spices. Serve it steaming hot in mugs for a comforting treat, or chill it in the refrigerator for a refreshing nonalcoholic drink everyone can enjoy.
Want to save this recipe?
Why You’ll Love Homemade Apple Cider
- Warm and cozy flavor – This homemade apple cider is filled with sweet apple taste in every sip. Cinnamon and allspice add warm, comforting flavor. It is a delicious drink for cool fall and winter days. Serve it hot when you want something cozy and soothing.
- Made with simple ingredients – You only need fresh apples, brown sugar, cinnamon, allspice, and water. These basic ingredients cook together into a flavorful homemade drink. There are no complicated steps or special ingredients needed. It is an easy recipe for making apple cider right at home.
- Perfect for the whole family – This apple cider is a nonalcoholic drink that all ages can enjoy. It is great for holiday gatherings, family dinners, or a relaxing evening at home. Kids and adults will love the sweet apple flavor. Pour it into mugs and enjoy it together.
- Delicious served hot or cold – Enjoy a warm mug of cider when the weather is chilly. You can also refrigerate it and serve it cold for a refreshing apple drink. Either way, the apple and spice flavors taste wonderful. This makes it a versatile drink for different occasions.
- Easy to customize with your favorite apples – You can make this cider with tart apples, sweet apples, or a combination of both. Using different apples lets you adjust the flavor to your taste. A mix of apples creates a delicious balance of sweetness and fresh apple flavor. It is a great way to use apples in a homemade fall drink.
Ingredients For Homemade Apple Cider
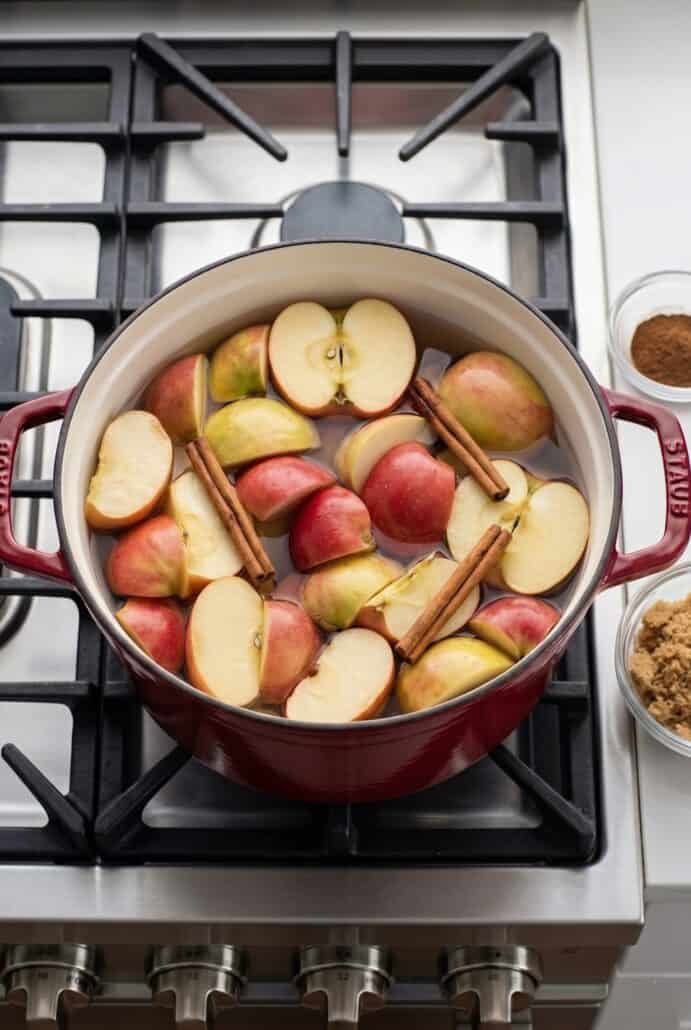
- Apples – Fresh quartered apples create the delicious apple flavor in this homemade cider. Use tart apples, sweet apples, or a combination of both.
- Water – Add enough water to cover the apples by 2 inches when they are pressed down into the stockpot.
- Light Brown Sugar – Adds sweetness to the homemade apple cider and blends with the warm spices.
- Cinnamon Sticks – Give the cider a warm cinnamon flavor. Ground cinnamon may also be used in place of cinnamon sticks.
- Ground Allspice – Adds extra warm spice flavor to the apple cider.
For the exact measurements of the ingredients, see the printable recipe card at the bottom of this article.
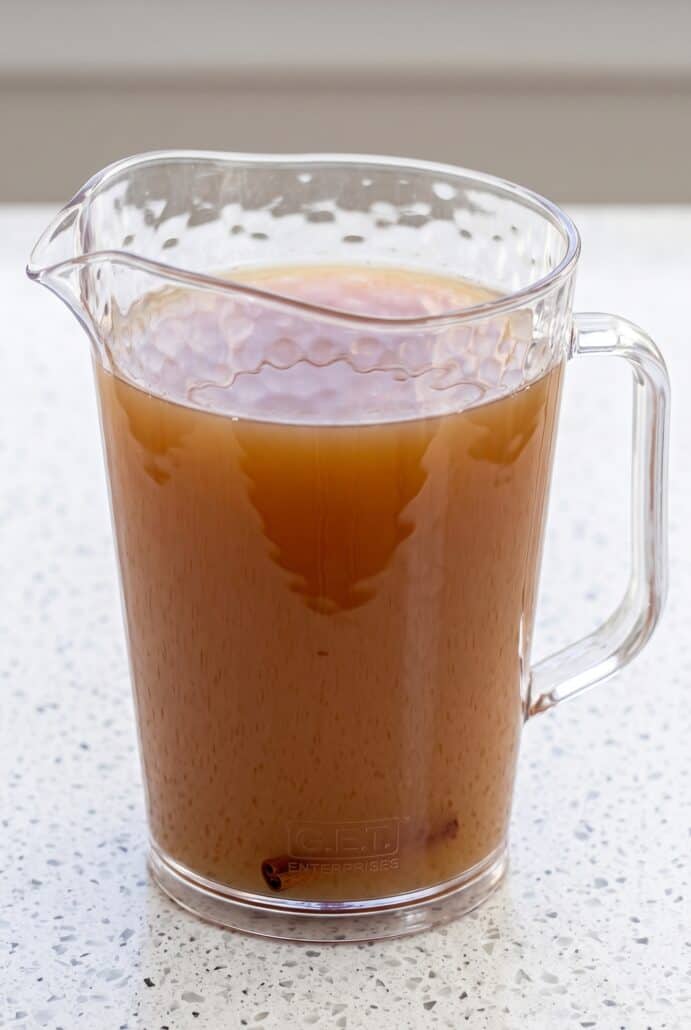
How To Make Homemade Apple Cider
- Add the quartered apples to a large stockpot and press them down gently so you can see how much water to add.
- Pour in enough water to cover the pressed-down apples by 2 inches. It is fine that the apples float back up after adding the water.
- Mix in the light brown sugar, cinnamon sticks, and ground allspice until everything is combined.
- Heat the pot until the apple mixture reaches a boil, then let it cook uncovered for 1 hour.
- Place a lid on the pot, turn the heat down, and let the cider simmer gently for another 2 hours.
- Remove the pot from the heat and allow the mixture to cool enough for safe handling.
- Pour the mixture through cheesecloth or a fine-mesh sieve into a large bowl, gently pushing on the cooked apples to extract the flavorful cider.
- Discard the apple solids, strain the liquid again for a smoother finish, and enjoy your homemade apple cider warm or chilled.
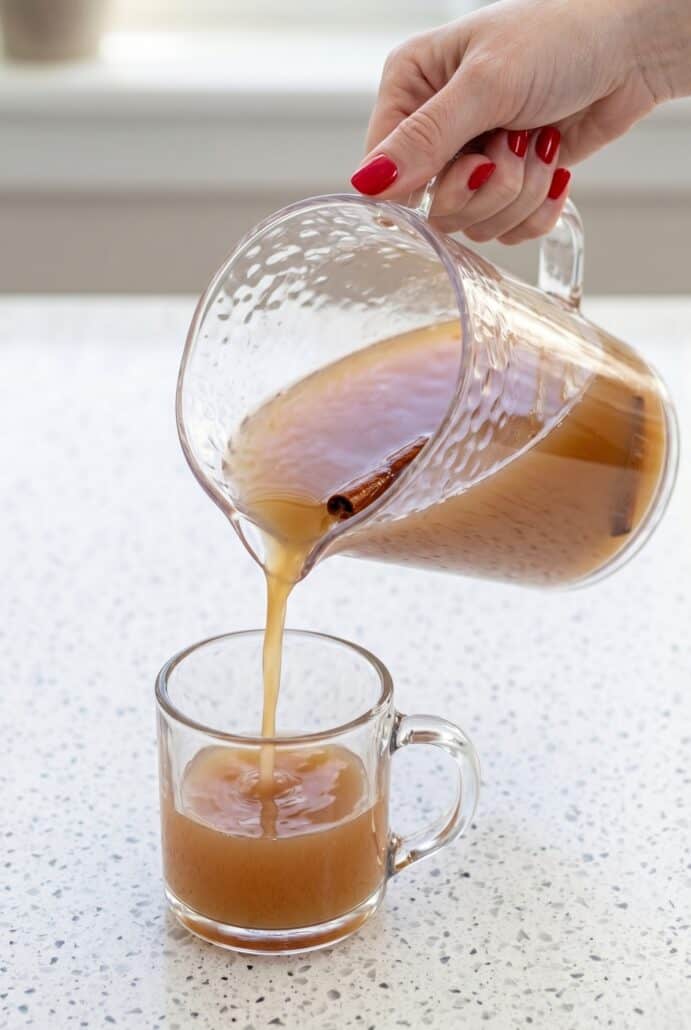
Serving Suggestions
- Serve this homemade apple cider warm with a slice of homemade apple cake for a cozy apple-themed dessert pairing.
- Pair a hot mug of apple cider with freshly baked apple muffins for a delicious fall breakfast or afternoon snack.
- Enjoy chilled homemade apple cider alongside a warm slice of apple pie for a classic apple dessert combination.
- Serve this family-friendly cider with homemade cinnamon rolls for a comforting holiday breakfast or weekend brunch.
- For an adults-only gathering, add rum, bourbon, sparkling wine, scotch, or cognac to the cider and serve it with a festive cheese and cracker platter.
Tips For Success
- Start with fresh apples that you enjoy eating. The type of apples you use will affect the flavor of your finished cider. For a sweeter cider, use sweet apples. For a more tart taste, choose tart apples. You can also combine sweet and tart apples for a balanced apple flavor.
- When adding water, press the apples down into the stockpot first. Add enough water so that the apples are covered by 2 inches while submerged. The apples will float after you release them, and that is perfectly normal. This ensures there is enough liquid for the apples and spices to cook together.
- Be sure to add the brown sugar, cinnamon, and allspice before bringing the mixture to a boil. These ingredients slowly flavor the liquid as the apples cook. Cinnamon sticks work especially well because they are easy to strain out later. Ground cinnamon can also be used when that is what you have on hand.
- Follow the cooking time for the fullest flavor. Boiling the apple mixture uncovered for 1 hour begins the cooking process and brings out the flavor of the apples. Simmering it covered for another 2 hours allows the cider to continue developing its sweet, spiced taste.
- Let the cooked apple mixture cool slightly before straining it. This makes it easier to handle safely. Use cheesecloth or a fine-mesh sieve over a large bowl to separate the liquid from the soft cooked apples and spices. Press gently on the solids to help release the cider, but do not rush the process.
- Strain the liquid a second time for an extra smooth homemade apple cider. This step helps remove any small pieces of apple or spice that passed through during the first straining.
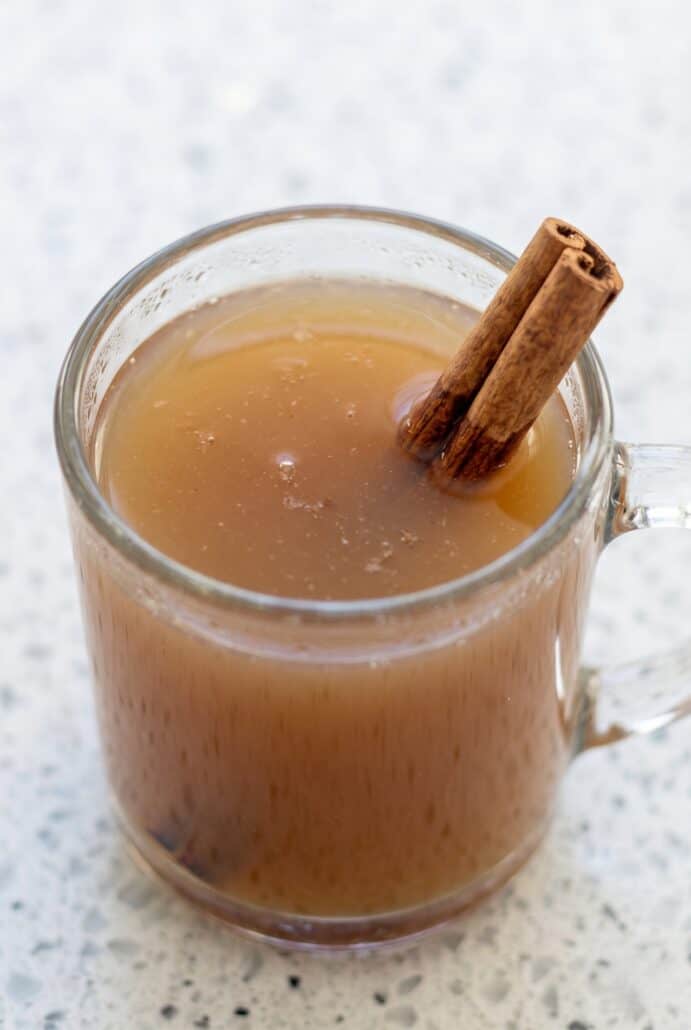
- You can enjoy the finished cider right away while it is warm, or refrigerate it to serve cold. When serving warm cider, pour it into mugs and add a cinnamon stick for a cozy presentation. Store any leftover apple cider in an airtight container in the refrigerator for up to 1 week.
Variations And Substitutions
- Homemade apple cider is easy to adjust based on the flavor you like and the ingredients you have available. One of the simplest ways to change this recipe is to use different kinds of apples. For a sweeter homemade cider, choose sweet apples such as Gala, Cortland, Golden Delicious, or Fuji. These apples will give the drink a smooth and naturally sweet apple flavor. For a more tart apple cider, use Pink Lady, Braeburn, or McIntosh apples. Tart apples give the finished drink a brighter and slightly tangy flavor.
- You can also use a combination of sweet and tart apples. This is a great option when you want a balanced homemade apple cider with plenty of fresh apple flavor. Mixing apple varieties gives the cider a little more depth while still keeping the recipe simple and delicious.
- The recipe uses cinnamon sticks to add warm spice flavor while the apples cook. When cinnamon sticks are not available, substitute ground cinnamon instead. Use 2 teaspoons of ground cinnamon in place of the 4 cinnamon sticks. The ground cinnamon will add the same cozy flavor, although the cider may need careful straining to remove any extra spice particles.
- This homemade apple cider is a nonalcoholic drink, making it perfect for serving to both children and adults. Serve it as written for a family-friendly beverage at fall dinners, holiday celebrations, or cozy gatherings. For an adults-only variation, you can add rum, sparkling wine, bourbon, scotch, or cognac to individual servings. This allows everyone to enjoy the same homemade cider while adults can customize their own mugs.
- You can also vary how you serve the cider. Serve it hot by warming it gently in a saucepan over low heat or heating an individual mug in the microwave. Hot apple cider is especially comforting during cooler weather. For a cold variation, refrigerate the strained cider until chilled and serve it cold. Whether you choose a sweeter apple blend, a more tart version, warm mugs, or chilled glasses, this easy apple cider is simple to customize for any occasion.
Storage And Reheating
- Refrigerator Storage – Pour the cooled homemade apple cider into an airtight container and store it in the refrigerator for up to 1 week.
- Serving Cold – Enjoy refrigerated apple cider straight from the fridge for a refreshing chilled drink.
- Stovetop Reheating – Pour the desired amount of cider into a saucepan and heat it over low heat until warm.
- Microwave Reheating – Pour a serving of cider into a microwave-safe mug and warm it in the microwave until heated through.
- Serving After Reheating – Pour the warm apple cider into mugs and garnish with a cinnamon stick for a cozy presentation.
Frequently Asked Questions
What Kind Of Apples Are Best For Homemade Apple Cider?
You can make homemade apple cider with the apples you prefer, depending on whether you want a sweeter or more tart drink. For a more tart cider, use apples such as Pink Lady, Braeburn, or McIntosh. For a sweeter cider, choose Gala, Cortland, Golden Delicious, or Fuji apples. You can also use a combination of sweet and tart apples for a balanced flavor. Mixing apple varieties is an easy way to give your cider a delicious fresh apple taste while making it just the way you like it.
Want to save this recipe?
Do I Need To Peel Or Core The Apples Before Making Apple Cider?
For this homemade apple cider recipe, the apples are simply quartered before they are added to the stockpot. There is no need to peel them first. After the apples cook with the water, sugar, cinnamon, and allspice, the mixture is strained through cheesecloth or a fine-mesh sieve. The cooked apple solids are then discarded, leaving behind the flavorful cider. This makes preparation easy because you do not need to spend extra time peeling the apples.
How Much Water Do I Add To Homemade Apple Cider?
The amount of water needed can vary depending on the size of your apples and the size of your stockpot. Place the quartered apples in the pot and press them down gently. Pour in enough water to cover the apples by 2 inches while they are submerged. Once you stop pressing them down, the apples will float, and that is normal. Using this method ensures that the apples have enough liquid to cook into a delicious homemade cider.
Can I Use Ground Cinnamon Instead Of Cinnamon Sticks?
Yes, you can use ground cinnamon in place of cinnamon sticks. This recipe calls for 4 cinnamon sticks, but you can substitute 2 teaspoons of ground cinnamon when needed. Both options give the apple cider its warm cinnamon flavor. When using ground cinnamon, be sure to strain the finished cider well, since the ground spice mixes into the liquid. Straining the cider twice helps create a smoother drink before serving.
Why Does Homemade Apple Cider Need To Cook For So Long?
The long cooking time helps the apples and spices flavor the liquid. First, the mixture boils uncovered for 1 hour. Then, the pot is covered, the heat is reduced, and the cider simmers for another 2 hours. During this time, the apples soften while the cinnamon, allspice, and brown sugar blend with the apple flavor. The result is a sweet, spiced homemade apple cider that can be enjoyed warm or cold.
How Do I Strain Homemade Apple Cider?
After the cider has finished simmering, let the mixture cool slightly so it is easier to handle. Place cheesecloth or a fine-mesh sieve over a large bowl, then pour the cooked apple mixture through it. Gently press down on the solids to help release more of the liquid. Discard the apple solids after straining. For an extra smooth cider, pour the liquid through the cheesecloth or fine-mesh sieve one more time before serving.
Can Homemade Apple Cider Be Served Hot Or Cold?
Yes, homemade apple cider is delicious served either hot or cold. To serve it hot, pour the cider into mugs after cooking, or reheat refrigerated cider in a saucepan over low heat. You can also warm an individual serving in the microwave. For cold cider, refrigerate the strained liquid until chilled, then pour it into glasses when ready to enjoy. Serving it hot makes it a cozy drink for fall and winter, while serving it cold makes it refreshing and easy to enjoy anytime.
Is This Homemade Apple Cider Nonalcoholic?
Yes, this homemade apple cider is a nonalcoholic drink made with apples, water, light brown sugar, cinnamon, and allspice. It is a family-friendly beverage that can be enjoyed by both children and adults. For an adults-only serving option, rum, sparkling wine, bourbon, scotch, or cognac can be added to an individual serving. This makes it easy to serve the plain cider to everyone while allowing adults to customize their own drinks.
How Long Does Homemade Apple Cider Last In The Refrigerator?
Homemade apple cider can be stored in an airtight container in the refrigerator for up to 1 week. Allow the cider to cool before transferring it to the storage container. You can pour a serving directly from the refrigerator when you want a cold drink, or gently reheat it when you prefer a warm mug of cider. Keeping it sealed in the refrigerator makes it easy to enjoy the homemade apple cider over several days.
Other Easy Apple Recipes
- Caramel Apple Crisp
- Homemade Apple Dumplings
- Apple Walnut Skyr Breakfast Bowl
- Kale Apple Salad
- Creamy Apple Cinnamon Smoothie
- Apple Coleslaw Recipe
- Air Fryer Apple Turnovers
Homemade Apple Cider
Want to save this recipe?
Ingredients
- 10 medium apples quartered
- Water enough to cover the apples by 2 inches when pressed down into the pot
- 1/2 cup packed light brown sugar
- 4 cinnamon sticks or 2 teaspoons ground cinnamon
- 1 tbsp ground allspice
Instructions
- Place the quartered apples in a large stockpot.
- Press the apples down and add enough water to cover them by 2 inches. The apples will float back up.
- Stir in the brown sugar, cinnamon sticks, and ground allspice.
- Bring the mixture to a boil and cook uncovered for 1 hour.
- Cover the pot, reduce the heat, and simmer for 2 hours.
- Let the apple mixture cool slightly before straining.
- Strain the cider into a large bowl through cheesecloth or a fine-mesh sieve, pressing gently on the apples to release the liquid. Discard the solids.
- Strain the cider one more time for a smoother drink, then serve hot or cold.
Notes
- Use tart apples, sweet apples, or a combination of both to make the cider flavor just the way you like it.
- Store apple cider in an airtight container in the refrigerator for up to 1 week.