Homemade Crispy Rice Appetizer Recipe
This post may contain affiliate links (disclosure).
Want to save this recipe?
Why You’ll Love Crispy Rice
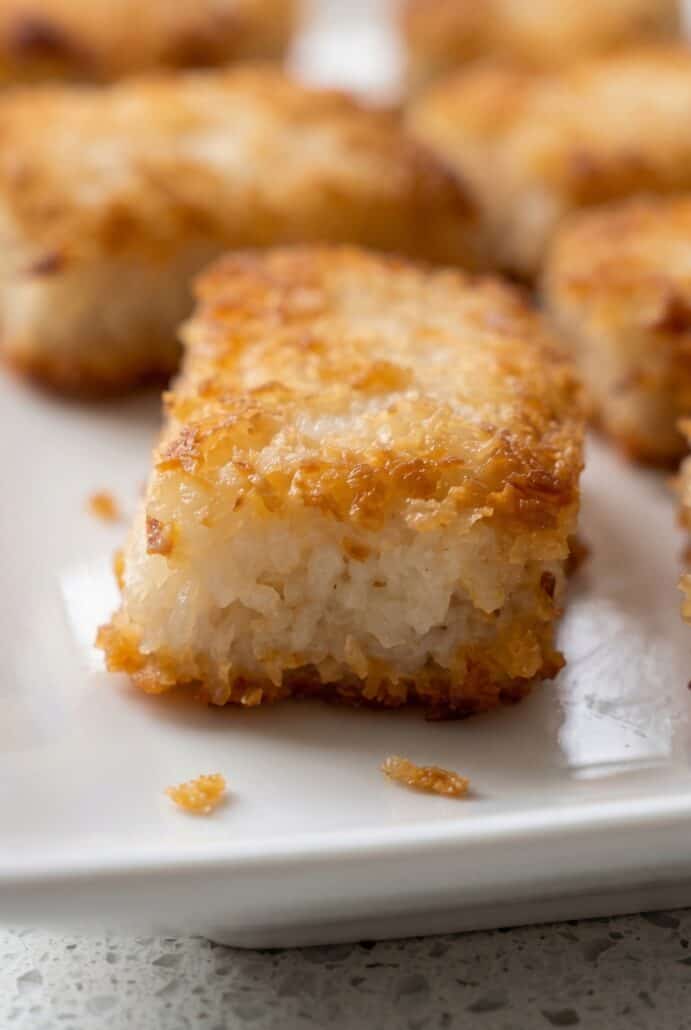
- Crispy Rice has the best texture. It is golden and crunchy on the outside. The inside stays soft and tender. Every bite is so satisfying.
- This recipe is a great way to turn simple sushi rice into something special. You only need a few basic ingredients. The steps are easy to follow. It makes a fun homemade appetizer without being complicated.
- These crispy rice squares are perfect for toppings. You can serve them plain or add tuna, salmon, avocado, cucumber, or furikake. They make a great base for sushi-style bites. This makes the recipe easy to customize.
- Crispy Rice is wonderful for parties and snacks. The pieces are bite-sized and easy to serve. They look impressive on a platter. Guests will love the crunchy texture.
- You can prepare the rice ahead of time. Once the rice is pressed into the pan, it chills in the refrigerator until firm. This makes slicing and frying much easier. It is a helpful recipe when you want to do some prep in advance.
Ingredients For Crispy Rice
- Sushi Rice – This is the best rice to use because it is sticky enough to hold together when shaped and fried. It creates rice squares that are crispy on the outside and soft in the center.
- Water – This is used to cook the rice until tender. The right amount of water helps the rice become soft but still firm enough to shape.
- Salt – Adds flavor to the rice so the crispy rice bites do not taste plain. A little salt makes the savory flavor stand out.
- Rice Vinegar – Gives the rice a light tangy flavor. It helps make the rice taste more like sushi rice.
- Granulated Sugar – Balances the tanginess of the rice vinegar. It adds just a touch of sweetness to the seasoned rice.
- Toasted Sesame Oil – Adds a delicious nutty flavor. A small amount gives the crispy rice extra depth and aroma.
- Vegetable Oil – Used for pan-frying the rice pieces until golden brown and crunchy. You only need enough to make a thin layer in the skillet.
For the exact measurements of the ingredients, see the printable recipe card at the bottom of this article.
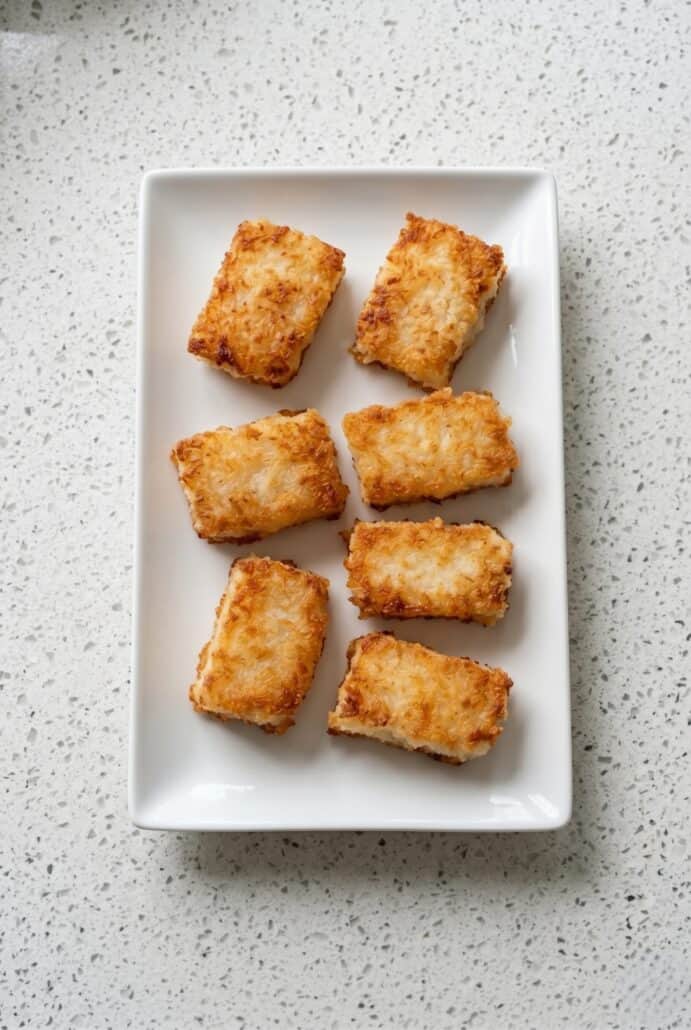
How To Make Crispy Rice
- Start by rinsing the sushi rice well until the water looks clear. This helps remove extra starch from the rice.
- Cook the rinsed rice with water in a rice cooker until it is tender and fully cooked.
- Mix the rice vinegar, sugar, salt, and toasted sesame oil in a small bowl until the sugar dissolves.
- Put the hot cooked rice into a mixing bowl and gently stir in the seasoning mixture.
- Line a square baking pan with plastic wrap and spread the seasoned rice into an even layer.
- Press the rice down gently so it holds together, then cover and refrigerate it for at least 3 hours.
- Take the chilled rice out of the pan and slice it into small squares or rectangles.
- Heat oil in a skillet and pan-fry the rice pieces until both sides are golden brown and crispy.
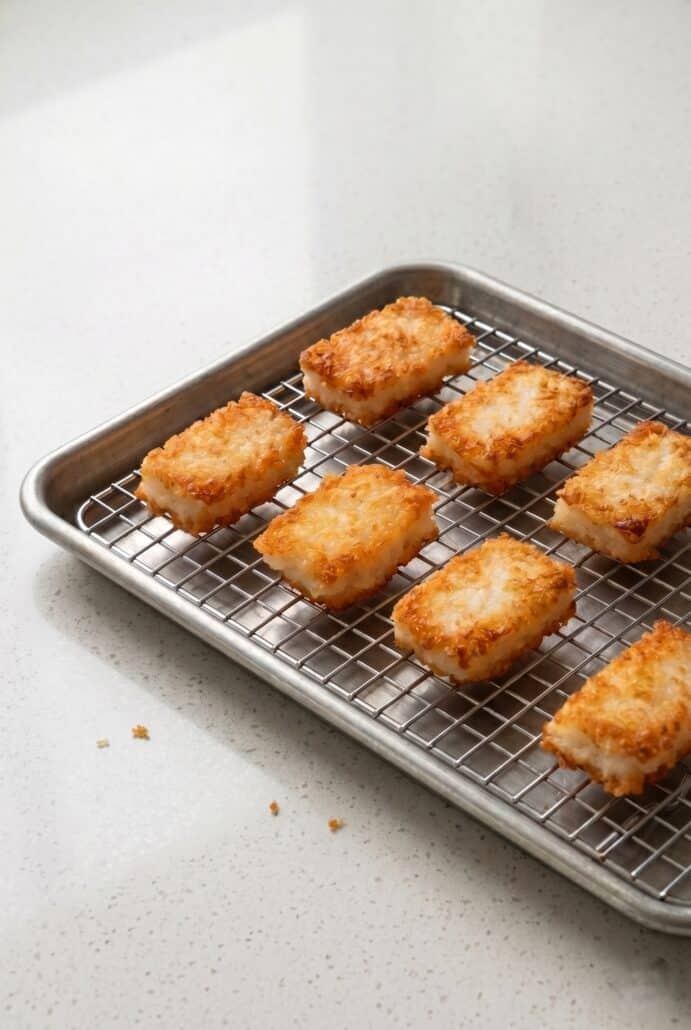
- Place the crispy rice on a wire rack so the outside stays crunchy.
- Serve right away plain or with your favorite toppings.
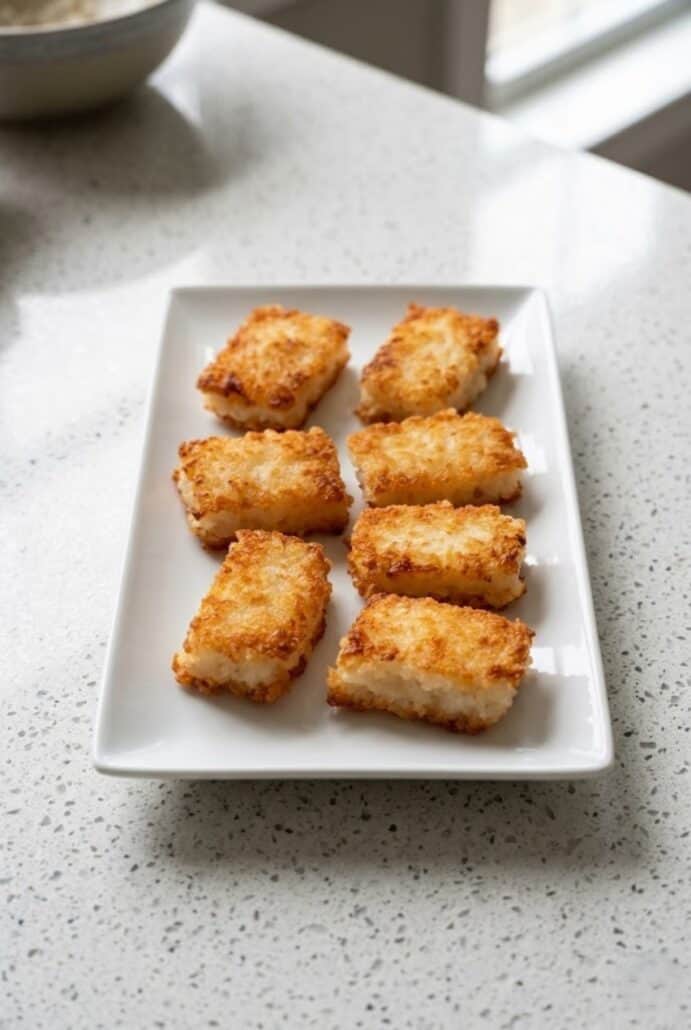
Serving Suggestions
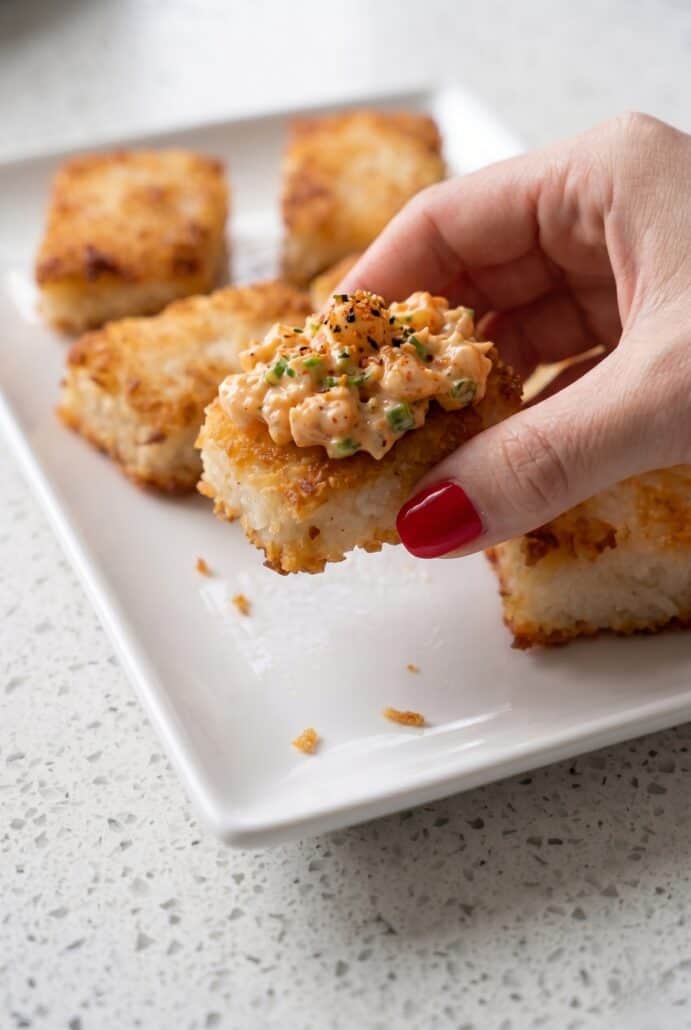
- Serve Crispy Rice topped with spicy tuna for a sushi-style appetizer that tastes amazing with the crunchy rice base.
- Add salmon topping for a fresh and flavorful crispy rice bite that is perfect for parties.
- Top each piece with avocado and cucumber for a simple vegetarian option that adds creaminess and crunch.
- Sprinkle with furikake for an easy snack-style crispy rice that has extra savory flavor.
- Drizzle with spicy sriracha mayo sauce for a creamy, zesty topping that pairs perfectly with the crispy outside and soft rice center.
- Serve alongside edamame, miso soup, or seaweed salad to make it part of a light Asian-inspired meal.
Tips For Success
- The most important tip for making Crispy Rice is to use sushi rice. Sushi rice is sticky enough to hold together after it is cooked, seasoned, pressed, chilled, and sliced. If the rice is too loose or fluffy, the pieces can fall apart when you try to pan-fry them. Rinse the rice well before cooking so the finished texture is not too gummy or mushy.
- When seasoning the rice, be gentle. Stir the rice vinegar, sugar, salt, and sesame oil mixture into the cooked rice without smashing the grains. A rice spoon or wooden spoon works well for this step. You want the rice to be seasoned evenly, but still have a nice texture.
- Pressing the rice into the pan is another important step. Line the pan with plastic wrap first so it is easy to remove later. Press the rice into an even layer about ½-inch thick. Make sure the rice is packed together enough to hold its shape, but do not mash it into a paste.
- Do not skip the chilling time. The rice needs at least 3 hours in the refrigerator so it firms up. Cold rice is much easier to cut into neat squares or rectangles. It also holds together better when it hits the hot oil.
- Before frying, pat the rice pieces dry if you see any moisture. Extra moisture can make the oil splatter. Heat the oil until hot before adding the rice. The rice should sizzle when it goes into the skillet.
- Fry the pieces in a single layer and leave space between them. This helps them crisp instead of steam. Watch them closely because they can brown quickly. Once both sides are golden and crispy, move them to a wire rack. This keeps the bottoms from getting soft and helps the crispy rice stay crunchy.
Variations And Substitutions
- Crispy Rice is easy to customize, which makes it such a fun recipe to make again and again. The rice squares are simple and savory on their own, so you can turn them into many different appetizers depending on what toppings you add. For a sushi-style version, top the crispy rice with spicy tuna, salmon, cucumber, avocado, or furikake. These toppings pair well with the crunchy outside and soft rice center.
- For a vegetarian version, keep the toppings fresh and simple. Add sliced avocado, cucumber, sesame seeds, or furikake. You can also drizzle the crispy rice with spicy mayo or a soy sauce-style dipping sauce. This gives the rice bites extra flavor without needing any fish or meat.
- If you want a heartier version, try adding cooked toppings. Small pieces of cooked shrimp, crab-style seafood, or even cooked salmon can work well. These options make the crispy rice feel more filling while still keeping it bite-sized and easy to serve.
- You can also change the shape of the rice pieces. Cut them into small rectangles for a classic appetizer look, or make them into squares for easy snacking. Just keep the pieces about the same size so they cook evenly in the skillet.
- Sushi rice is the best choice for this recipe because it is sticky and holds together well. Other types of rice may not work as well because they can fall apart when sliced or fried. If you do use another rice, choose one that is short-grain and sticky.
- For the oil, use a neutral cooking oil for pan-frying. Vegetable oil works well because it lets the flavor of the seasoned rice stand out. Make sure there is enough oil in the skillet to crisp the rice, but you do not need to deep-fry it.
- You can also adjust the seasoning slightly. Add a little more sesame oil for a nuttier flavor, or keep it light if you want the toppings to be the main flavor. The best part is that Crispy Rice can be served plain, dressed up, or turned into a beautiful appetizer platter.
Storage And Reheating
- Store leftover Crispy Rice in an airtight container in the refrigerator. It is best enjoyed fresh, but leftovers can be kept for 3 to 5 days.
- To reheat, place the crispy rice pieces back in a skillet with a little oil and pan-fry until warm and crispy again. This is the best way to bring back the crunchy texture.
- You can also microwave the rice pieces with a few drops of water until warmed through. The microwave method is faster, but the rice will be softer and not as crispy.
- For best results, store the crispy rice without toppings. Add toppings right before serving so the rice does not get soggy.
Frequently Asked Questions
What kind of rice is best for Crispy Rice?
Sushi rice is the best rice to use for Crispy Rice because it is short-grain and naturally sticky. This helps the rice hold together after it is cooked, seasoned, pressed into a pan, chilled, and sliced. The sticky texture is important because the rice pieces need to stay firm when they are pan-fried in hot oil. If the rice is too fluffy or dry, the pieces may crumble or fall apart in the skillet.
Sushi rice also gives you the best texture after frying. The outside becomes golden brown and crispy, while the inside stays soft and tender. That contrast is what makes Crispy Rice so delicious. Long-grain rice is not the best choice for this recipe because it usually does not stick together as well. For best results, use dry sushi rice and rinse it well before cooking.
Why do I need to rinse the rice before cooking?
Rinsing the rice helps remove extra starch from the outside of the grains. This step keeps the rice from becoming too gummy or mushy after cooking. You still want the rice to be sticky enough to hold together, but not so sticky that it turns into a thick paste. Rinse the rice several times until the water looks clear.
This step only takes a few minutes, but it makes a big difference in the final texture. Clean, rinsed rice cooks up better and is easier to season. It also helps the crispy rice pieces keep their shape when you press them into the pan and cut them later. Do not skip this step if you want neat, crispy squares.
Want to save this recipe?
Why does the rice need to chill before frying?
The rice needs to chill so it can firm up. After the seasoned rice is pressed into the pan, the refrigerator helps it hold its shape. Cold rice is much easier to slice into clean squares or rectangles. If you try to cut warm or freshly cooked rice, it may be too soft and sticky.
Chilling also helps the rice become slightly drier on the surface. This is helpful for frying because extra moisture can make the oil splatter. Let the rice chill for at least 3 hours, or overnight if you want to prepare it ahead of time. The firmer the rice is, the easier it will be to pan-fry without breaking.
How do I keep Crispy Rice from falling apart?
The key is to press the rice firmly into the pan before chilling. The rice should be packed together enough to hold its shape, but not mashed so hard that the grains turn into paste. A smooth, even layer about ½-inch thick works well. Make sure there are no large air pockets in the rice layer.
Using sushi rice also helps because it is naturally sticky. After chilling, use a sharp knife to cut the rice into bite-sized pieces. If the rice feels too soft, chill it longer before frying. When adding the pieces to the skillet, handle them gently so they stay intact.
Why is my Crispy Rice sticking to the pan?
Crispy Rice can stick if the oil is not hot enough before the rice is added. The rice should sizzle when it touches the oil. If the oil is too cool, the rice may absorb oil and stick instead of crisping right away. Make sure the skillet is hot and there is enough oil to coat the bottom in a thin layer.
It can also stick if you try to flip the pieces too soon. Let each side cook until it is golden and crisp before turning. Once a crust forms, the rice should release more easily from the pan. Use a spatula and flip gently so the rice pieces stay together.
Can I make Crispy Rice ahead of time?
Yes, you can prepare the rice ahead of time by cooking, seasoning, pressing, and chilling it in the refrigerator. This is actually a great make-ahead step because the rice needs time to firm up before frying. You can chill it for at least 3 hours or leave it overnight.
For the best texture, pan-fry the rice right before serving. Freshly fried Crispy Rice has the crunchiest outside and the best soft center. You can store leftovers, but they will not be quite as crisp as when they are first cooked. Add toppings right before serving so the rice does not get soggy.
What can I serve on top of Crispy Rice?
Crispy Rice is delicious plain, but it is also perfect with toppings. Try spicy tuna, salmon, avocado, cucumber, furikake, or spicy mayo. These toppings work well because the crispy rice makes a crunchy base for sushi-style flavors.
For a vegetarian option, use avocado, cucumber, sesame seeds, and furikake. For a party platter, make several different toppings so everyone can choose their favorite. Keep the toppings ready separately and add them just before serving for the best texture.
Other Easy Rice Recipes
- Bacon Rice Skillet Recipe
- Ground Turkey Rice Soup
- Garlic Butter White Rice
- High Protein Bone Broth Rice
- Healthy Carrot Rice
- Cilantro Lime Rice
- Mushroom Rice Pilaf
Crispy Rice
Want to save this recipe?
Ingredients
- 1 ½ cups dry sushi rice rinsed until the water runs clear
- 2 cups water
- 1 tsp salt
- 3 tbsp rice vinegar
- 1 tbsp granulated sugar
- 1 tsp toasted sesame oil
- ½ cup vegetable oil to ¾ cup, for pan-frying
Instructions
- Rinse the sushi rice several times until the water runs clear, then add the rice and water to a rice cooker and cook until done.
- In a small bowl, mix the salt, rice vinegar, sugar, and toasted sesame oil until the sugar dissolves.
- Transfer the cooked rice to a mixing bowl, pour the vinegar mixture over it, and gently stir until evenly seasoned.
- Line a square baking pan with plastic wrap, add the seasoned rice, and press it into an even ½-inch thick layer.
- Cover the rice and refrigerate for at least 3 hours, or overnight, until firm and easy to slice.
- Remove the chilled rice from the pan, cut it into bite-sized squares or rectangles, and pat dry if there is any moisture.
- Heat vegetable oil in a large skillet over medium-high heat, then carefully add the rice pieces with space between each one.
- Cook for 1 to 2 minutes per side, or until golden brown and crispy, then transfer to a wire rack and serve right away.
Notes
- Make sure the rice is chilled before slicing and frying. Cold rice holds its shape better and is easier to cut into neat pieces.
- Let the fried rice pieces cool on a wire rack instead of a plate. This helps keep them crispy instead of soggy.