Air Fryer Duck Breast Recipe: Crispy Skin & Tender Meat
This post may contain affiliate links (disclosure).
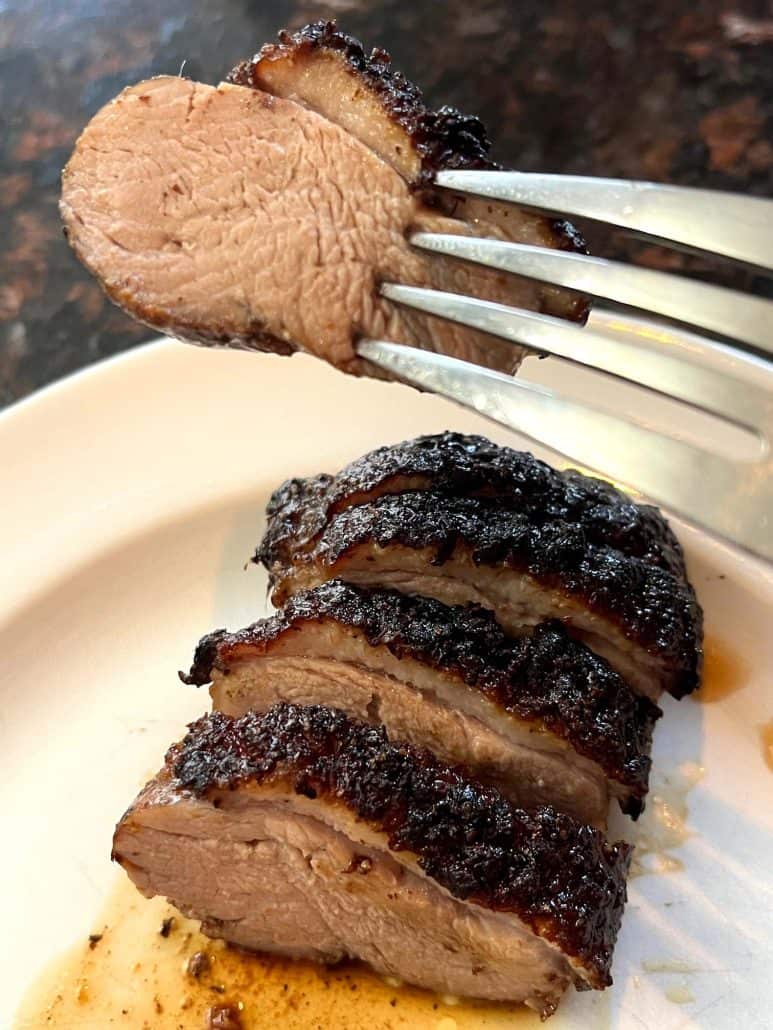
If you’ve never cooked duck breast at home, this air fryer recipe will show you just how easy and delicious it can be! The skin crisps up beautifully while the meat stays tender and juicy—all with no preheating or complicated steps. Whether you’re cooking for yourself or impressing guests, this duck breast will be the star of your dinner table.
Want to save this recipe?
Why You’ll Love Air Fryer Duck Breast
-
It’s unbelievably easy to make. Just season the duck breast, pop it in the air fryer, and you’re done—no preheating or fancy techniques required. This recipe is perfect for busy weeknights or last-minute dinners. You’ll be amazed at how effortless it is to cook duck at home.
-
Crispy skin without the mess. The air fryer gives you that golden, crispy duck skin without splattering oil or using the stovetop. No need to babysit it while it cooks. Just set the timer and let the air fryer do all the work.
-
Juicy and flavorful every time. The duck breast comes out tender, moist, and full of rich flavor. It’s seasoned simply with salt, pepper, garlic powder, and paprika for a delicious balance. You’ll want to savor every bite.
-
Restaurant-quality results at home. This dish looks and tastes like something you’d order at a fancy restaurant. But you can make it with minimal ingredients and no special skills. It’s an impressive meal made simple.
-
Perfect for a variety of diets. This recipe is naturally gluten-free and low in carbs, making it a great choice for different lifestyles. Plus, you can easily adjust the seasoning to suit your preferences. It’s a versatile protein that fits right into your weekly meal rotation.
Ingredients For Air Fryer Duck Breast
-
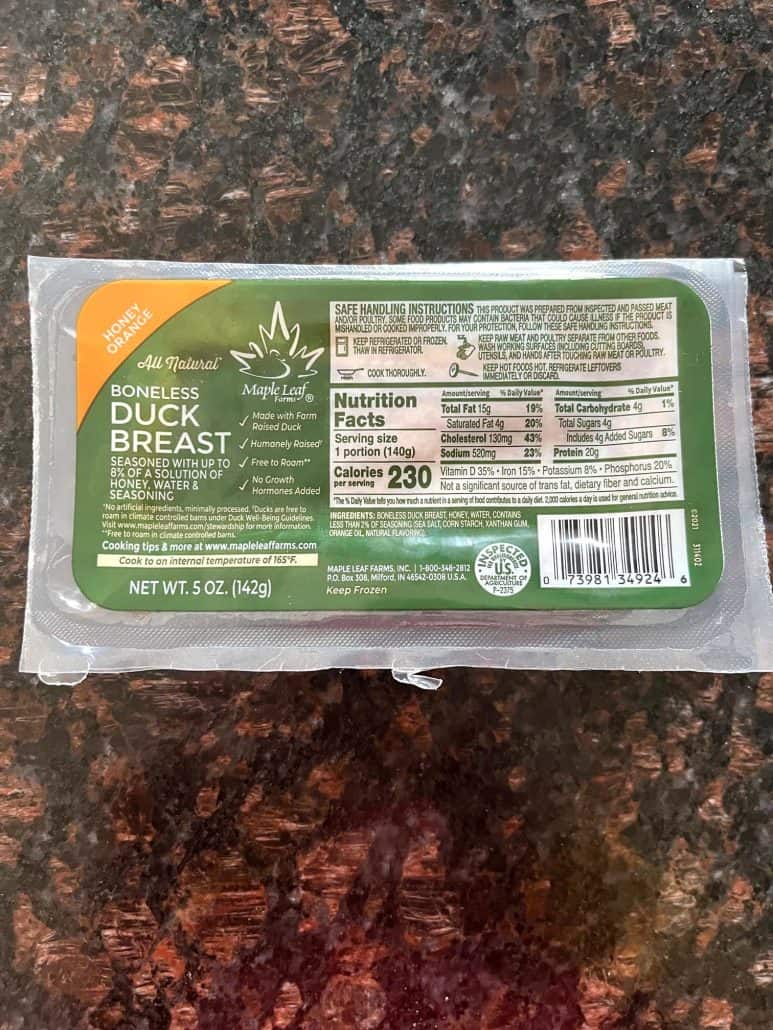
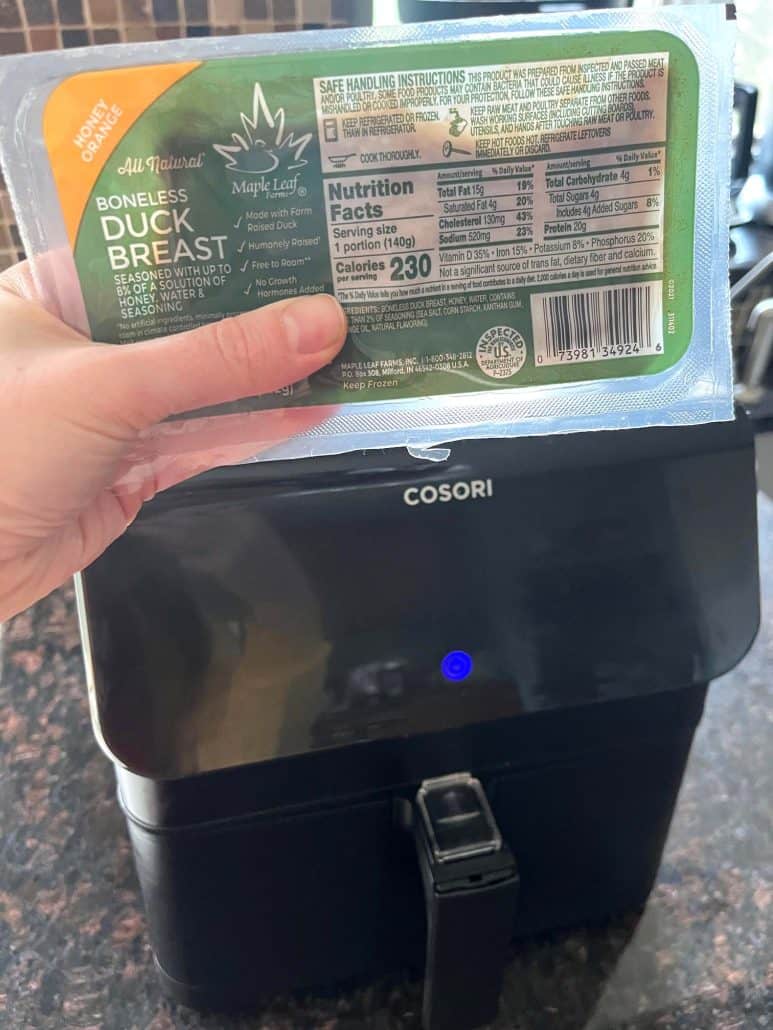
Duck breast – The star of the recipe! Use one thawed duck breast for best results. If using frozen, just add five extra minutes to the cooking time.
-
Salt – Brings out the natural flavor of the duck and enhances the seasoning blend.
-
Black pepper – Adds a mild kick and depth of flavor.
-
Garlic powder – Gives a warm, savory taste that complements the richness of the duck.
-
Paprika – Adds subtle smoky flavor and a touch of color to the finished dish.
For the exact measurements of the ingredients, see the printable recipe card at the bottom of this article.
Kitchen Tools You Need To Make Air Fryer Duck Breast
-
Air fryer – The key appliance that crisps up the duck skin while keeping the meat juicy and tender.
-
Measuring spoons – To measure out your salt, pepper, garlic powder, and paprika accurately.
-
Meat thermometer – Ensures your duck is safely cooked to at least 165°F.
-
Knife – For slicing the duck breast into thin, juicy pieces once it’s cooked.
-
Cutting board – A safe and clean surface for seasoning and slicing the duck.
How To Make Air Fryer Duck Breast
-
Take the duck breast out of its packaging and pat it dry with a paper towel if needed.
-
Sprinkle salt, black pepper, garlic powder, and paprika evenly over one side of the duck.
-
Rub the seasoning into the meat to help it stick and boost flavor.
-
Flip the duck breast over and repeat the seasoning on the other side.
-
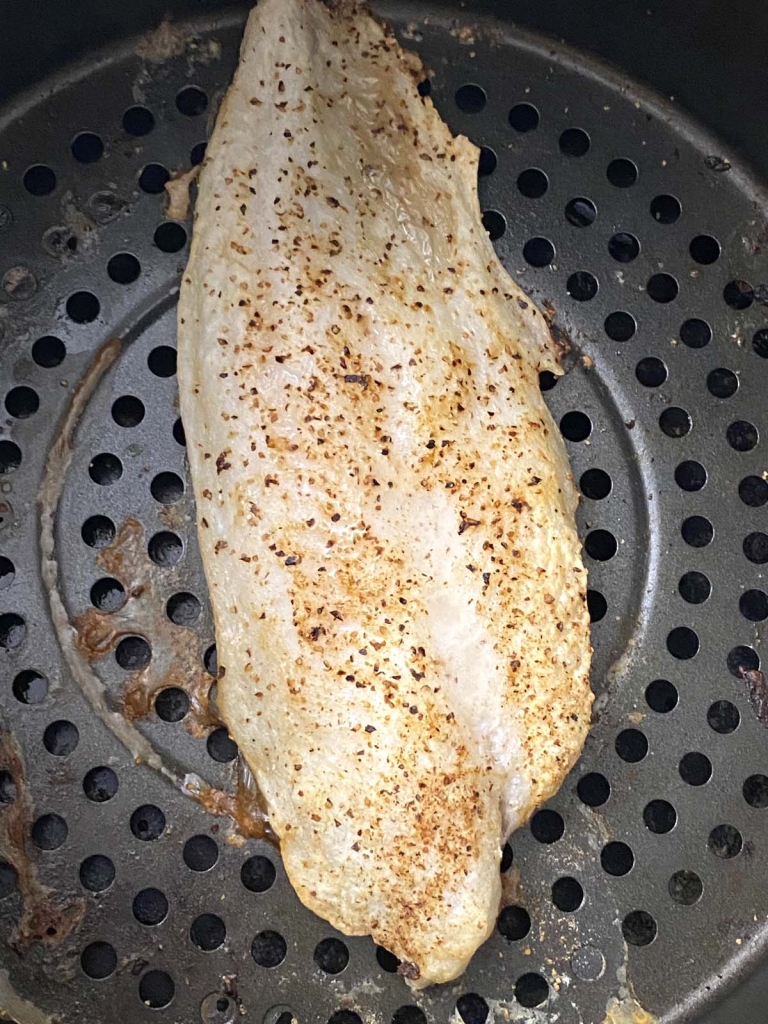
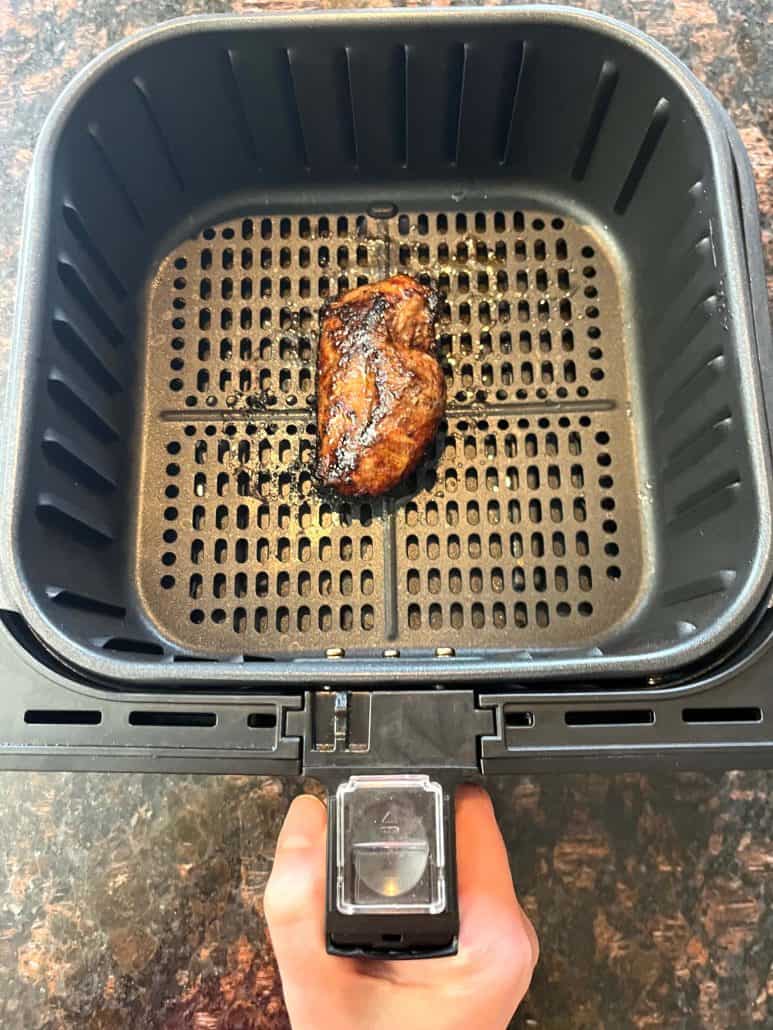
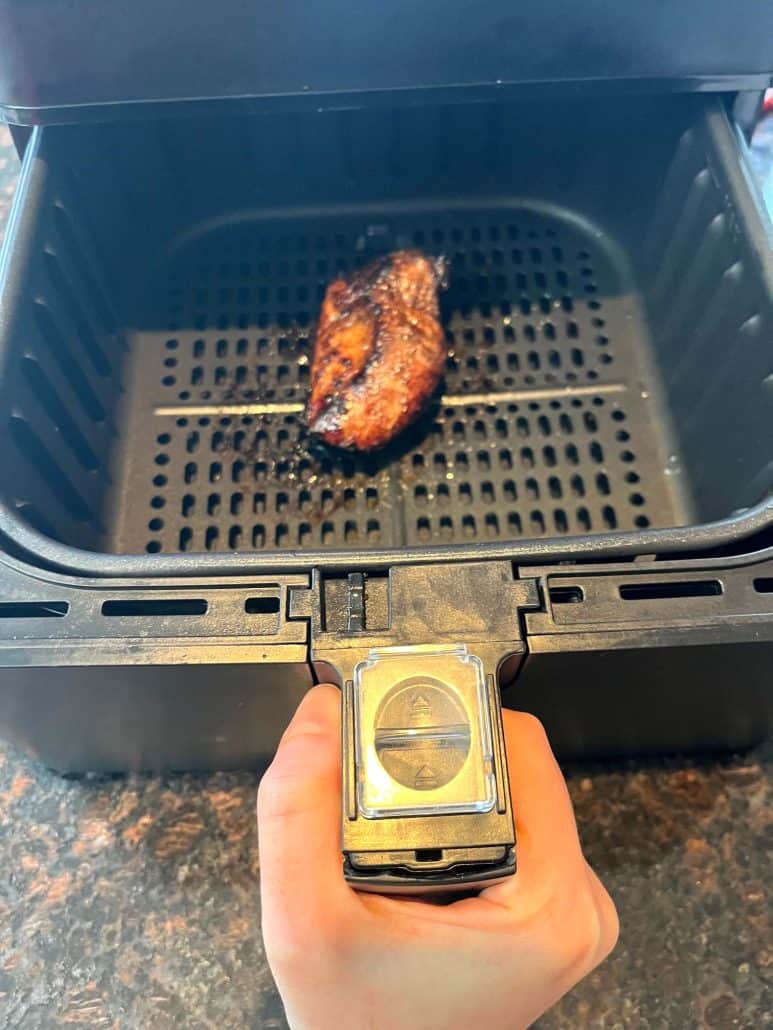
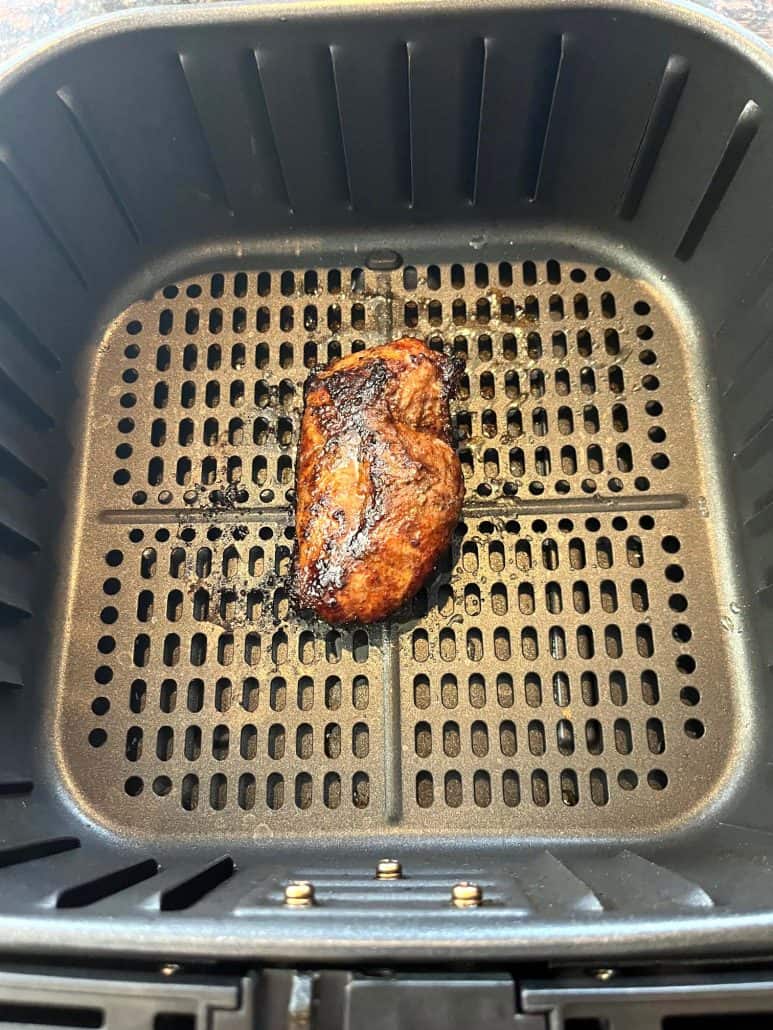
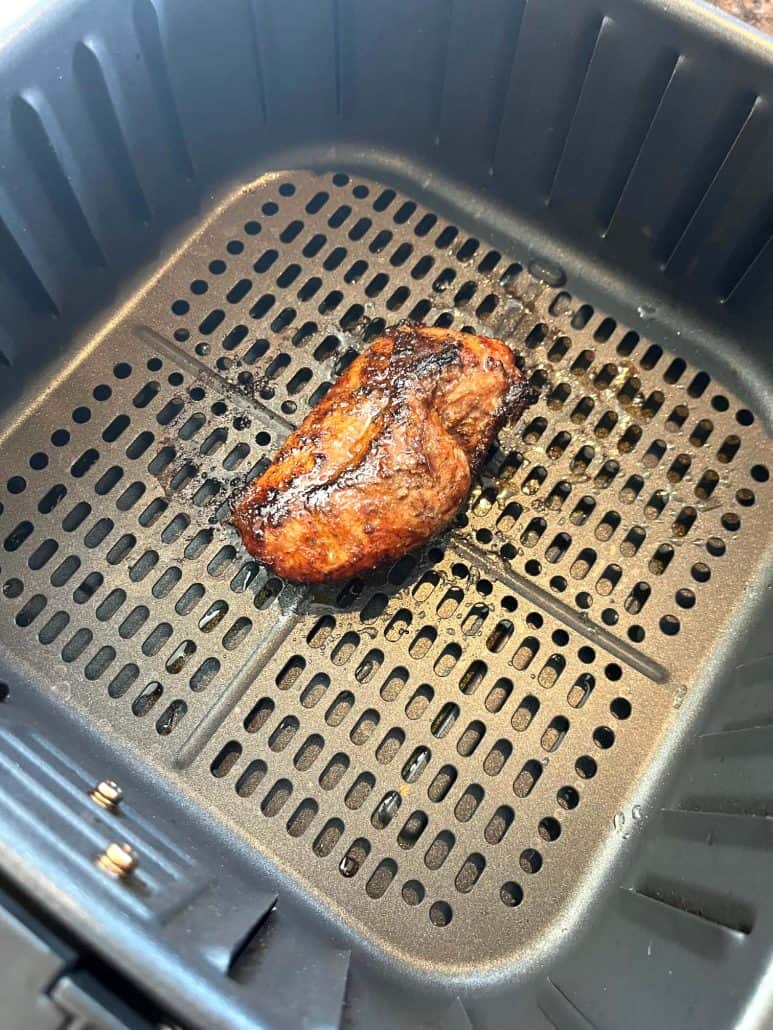
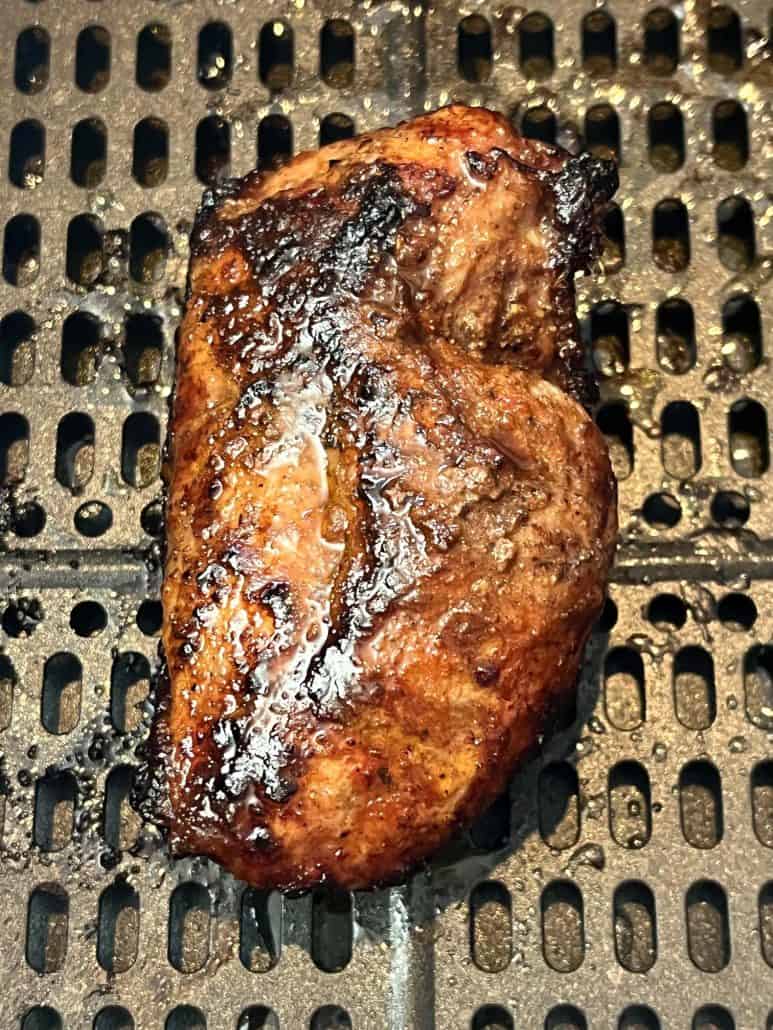
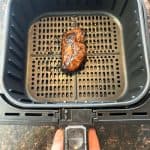
Place the duck breast skin-side up in the air fryer basket.
-
Insert the basket into the air fryer and set it to 400°F.
-
Cook for 15 minutes. If using frozen duck, cook for 20 minutes.
-
Use a meat thermometer to check if the internal temperature has reached 165°F.
-
If it’s not fully cooked, air fry for a few extra minutes until it reaches temperature.
-
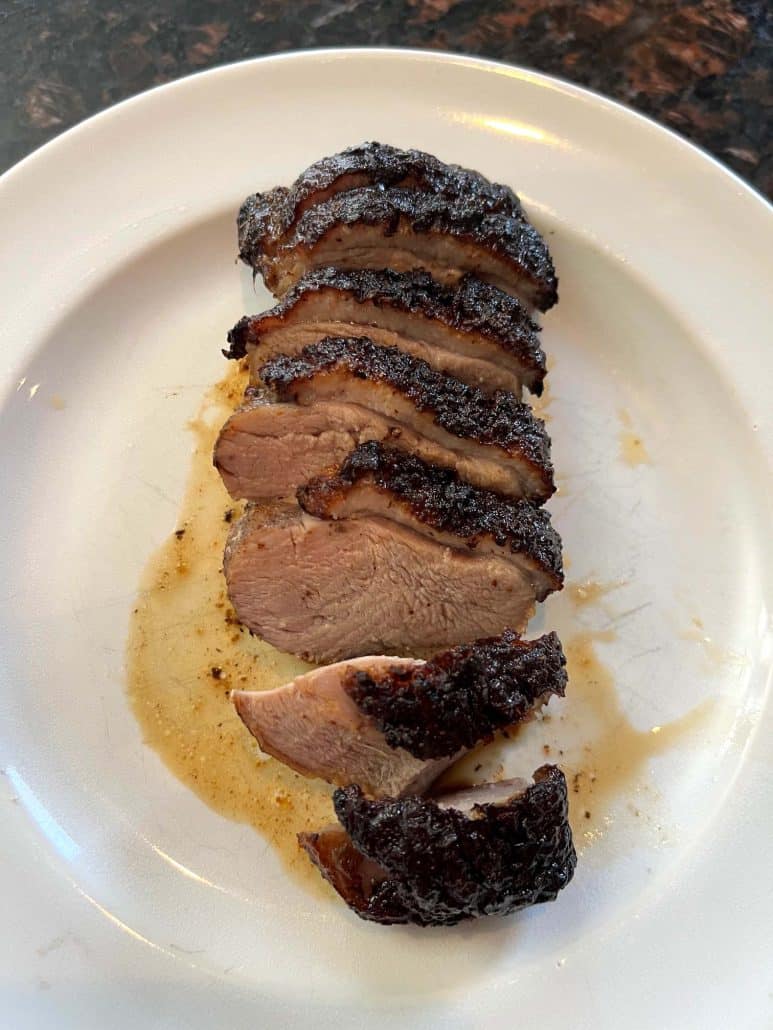
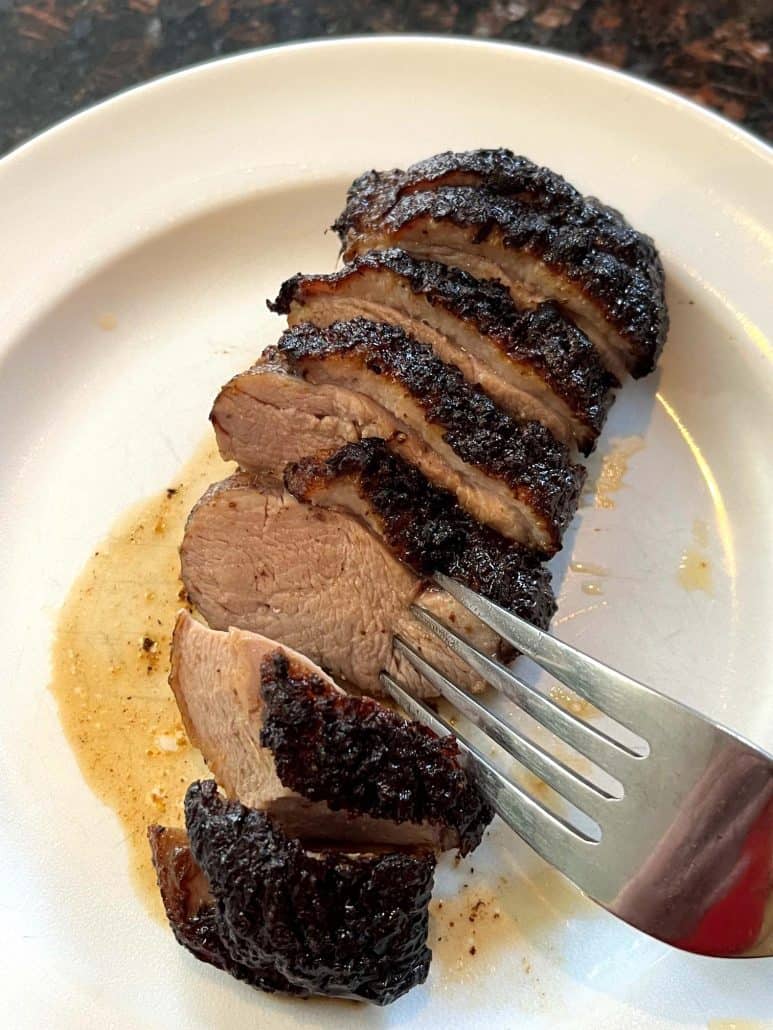
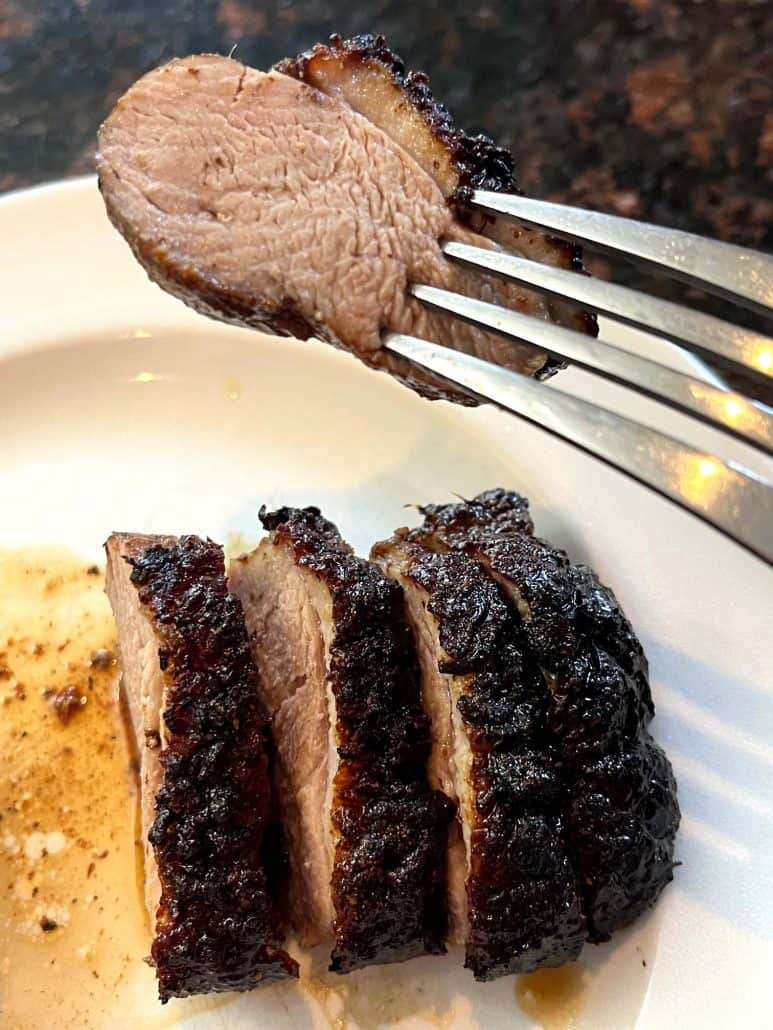
Once done, remove and let it rest for a couple minutes before slicing into thin pieces.
Serving Suggestions
-
Serve sliced duck breast over a Brussels Sprouts Salad with a balsamic glaze for a light, elegant salad.
-
Pair it with roasted brussels sprouts and carrots, or sweet potatoes for a hearty, comforting meal.
-
Add it to a grain bowl with fluffy quinoa or white rice, fresh herbs, and a drizzle of olive oil or lemon vinaigrette.
-
For a gourmet twist, serve it alongside a fruity sauce like homemade cranberry sauce or orange reduction.
-
Use it as a protein-packed topping for flatout flatbread, wraps, or grilled cheese sandwich.
Want to save this recipe?
Tips For Success
-
Thaw before cooking: Make sure your duck breast is fully thawed for even cooking. If using frozen, add about 5 extra minutes to the cook time and check doneness with a thermometer.
-
Season both sides: Don’t skip seasoning both sides of the duck breast. This ensures every bite is flavorful and balanced with salt, pepper, garlic powder, and paprika.
-
No oil needed: The duck skin has enough natural fat to crisp up beautifully in the air fryer—no added oil or butter required. Cooking it skin-side up helps render the fat and achieve a golden, crispy finish.
-
Check with a thermometer: Always use a meat thermometer to ensure the internal temperature reaches at least 165°F. Cooking times may vary depending on the size of the duck breast, so this step is key for perfect doneness.
-
Let it rest before slicing: Give the duck breast a few minutes to rest after cooking. This locks in the juices and keeps the meat tender and moist when sliced.
-
Slice thinly against the grain: Use a sharp knife to cut thin slices across the grain. This gives the best texture and helps the duck stay tender and easy to eat.
-
No preheating required: One of the best parts of this recipe—there’s no need to preheat the air fryer. Just place the duck breast in and start cooking!
Variations And Substitutions
-
Try different seasonings: Swap out the basic spices for something bold like Chinese five-spice for a rich, aromatic flavor. You can also sprinkle on cayenne or chili powder for heat, or add dried rosemary or thyme for an herby twist.
-
Lower the sodium: Cut back on salt or use a salt-free seasoning blend if you’re watching your sodium intake. The garlic powder and paprika still add plenty of flavor on their own.
-
Use other proteins: You can follow similar steps for chicken thighs or tofu if you don’t eat duck. Just adjust the cooking time and check internal temperatures—chicken should be 165°F, tofu cooks faster at 10–12 minutes.
-
Add a finishing sauce: After cooking, drizzle your duck with hoisin sauce, orange glaze, or balsamic reduction. These pair beautifully with the richness of the meat. Avoid adding sugary sauces before air frying, as they can burn.
-
Make it meal prep friendly: Cook extra duck breasts and slice them for use in salads, wraps, or bowls during the week. It stores and reheats well, making it a great protein for advance meal prep.
Storage and Reheating
-
Refrigerate leftovers: Store any leftover duck breast in an airtight container in the fridge for up to 3 days.
-
Reheat in the air fryer: To keep the skin crispy, reheat slices in the air fryer at 350°F for 3–5 minutes.
-
Microwave option: For a quicker method, microwave on a microwave-safe plate for 30–60 seconds. Just note that the skin won’t stay crispy this way.
-
Freezing: You can freeze cooked duck breast! Let it cool completely, then wrap tightly and store in a freezer-safe bag for up to 2 months.
-
Reheat from frozen: Thaw overnight in the fridge, then reheat in the air fryer to restore the texture and warmth.

Frequently Asked Questions
Can I cook duck breast from frozen in the air fryer?
Yes! You can cook duck breast straight from frozen. Just add about 5 extra minutes to the cooking time. Always use a meat thermometer to make sure it reaches at least 165°F internally before serving.
Do I need to score the skin before air frying?
No scoring is necessary for this recipe. The air fryer does a great job of rendering the fat from the skin and getting it nice and crispy without any extra steps. That’s part of what makes this method so easy!
How do I know when the duck is done?
Use a meat thermometer to check the internal temperature—it should read at least 165°F. The cooking time may vary slightly depending on the size of the duck breast, so checking the temp is the best way to be sure.
Can I use different seasonings?
Absolutely! This recipe is super versatile. You can change up the spices based on your taste—try smoky flavors, spicy blends, or even something sweet and savory like a maple rub.
What should I serve with duck breast?
This duck breast goes well with lots of sides. Roasted veggies, mashed potatoes, a fresh salad, or even rice bowls are all great options. You can also serve it with fruit-based sauces like orange or cherry glaze for an elegant touch.
Is duck breast healthy?
Duck breast is a good source of protein and nutrients like iron and zinc. It’s higher in fat than chicken or turkey, especially with the skin on, but air frying helps render much of the fat away while still giving you great flavor.
Why didn’t my skin get crispy?
Make sure the duck is placed skin-side up and isn’t crowded in the air fryer. Also, don’t cover it or add sauce while it’s cooking. If your duck was very large, it might just need a few more minutes to crisp up fully.
Other Easy Main Dish Recipes
Healthy Chicken Pasta Salad – This colorful chicken pasta salad is packed with fresh veggies, lean protein, and tossed in a light dressing for the perfect make-ahead lunch or dinner.
Creamy Dijon Chicken Breast Recipe – Juicy chicken breasts are simmered in a rich, tangy Dijon mustard sauce for a quick and flavorful weeknight meal.
Quick Pan-Seared Bay Scallops – These tender bay scallops are pan-seared to golden perfection in just 5 minutes for an easy and elegant seafood dish.
One-Pan Ground Turkey and Potatoes – This hearty skillet meal combines seasoned ground turkey and crispy potatoes for a comforting dinner with minimal cleanup.
Quick Sautéed Chicken Livers – A fast and nutrient-rich meal, these chicken livers are sautéed with simple seasonings for bold flavor in just 10 minutes.
Crispy Fried Grouper Fillets – Lightly breaded and pan-fried, these grouper fillets come out golden brown and crispy every time.
Air Fryer Baked Stuffed Tomatoes – Juicy tomatoes are filled with a savory stuffing and crisped up in the air fryer for an easy, low-carb side dish.
Air Fryer Duck Breast
Want to save this recipe?
Recipe Video
Ingredients
- 1 duck breast thawed; if frozen, add 5 extra minutes to cook time
- 1/2 tsp salt
- 1/4 tsp black pepper
- 1/4 tsp garlic powder
- 1/4 tsp paprika
Recommended Kitchen Tools (click the links below to see the items used to make this recipe)
- meat thermometer
Instructions
- Remove the duck breast from packaging.
- Season one side with salt, black pepper, garlic powder, and paprika.
- Rub the seasonings into the duck breast.
- Flip the duck breast and repeat seasoning on the other side.
- Place duck breast in the air fryer basket skin side up.
- Set the air fryer to 400°F for 15 minutes.
- After cooking, check the internal temperature with a meat thermometer. It should be at least 165°F.
- If not fully cooked, return to the air fryer for a few more minutes.
- Slice into thin pieces and serve!
Notes
- Cooking time may vary depending on the size of the duck breast. Larger pieces may need a few extra minutes.
- Always check for doneness with a meat thermometer to ensure food safety.
- No need to preheat the air fryer for this recipe.
Nutrition
More Air Fryer Recipes
- Air Fryer Frozen Turkey Pot Pie
- Nathan’s Pretzel Dogs in the Air Fryer
- Air Fryer Spinach from Frozen