Chicken Onion Pita Bread Pizza Recipe – Quick & Easy
This post may contain affiliate links (disclosure).
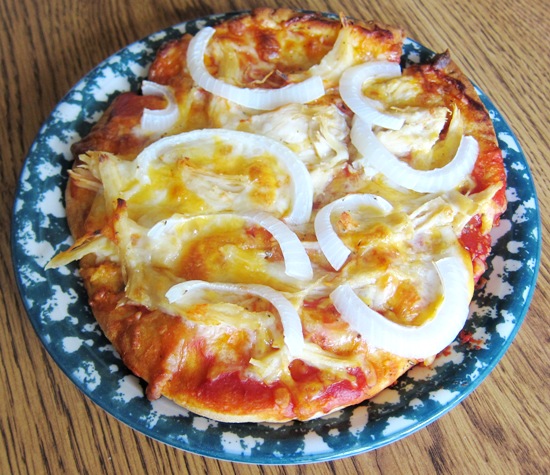
If you’re looking for a quick and delicious meal, this Chicken Onion Pita Pizza is the answer! With just a few simple ingredients, you can transform pita bread into a flavorful, crispy pizza crust topped with tender chicken, fresh onions, and gooey cheese. Perfect for a weeknight dinner or a fun meal for kids, this recipe is ready in just 15 minutes!
Why You’ll Love Chicken Onion Pita Pizza
- Quick and Easy: This recipe takes just 15 minutes from start to finish, making it perfect for busy weeknights when you need dinner on the table fast.
- Versatile and Customizable: You can use any type of pita bread and swap out the toppings to suit your taste or use up what’s in your fridge. The options are endless!
- Kid-Friendly: The small, individual-sized pizzas are fun for kids to make and eat. Let them choose their own toppings for a creative and interactive meal experience.
- Great for Leftovers: This recipe is a fantastic way to use up leftover chicken, turning it into a whole new meal that’s both delicious and satisfying.
- Healthy and Delicious: Made with simple ingredients like chicken, onions, and whole pita bread, this pizza is a healthier option than takeout and just as tasty!
Ingredients for Chicken Onion Pita Pizza
- Pita Breads: The perfect instant pizza crust – any type works!
- Chopped Chicken: Adds protein and a delicious flavor; canned or leftover chicken works well.
- Onion: Sliced thin for a sweet, savory topping.
- Shredded Cheese: Melts beautifully over the pizza, adding a gooey, cheesy layer.
- Tomato Sauce: Provides a classic pizza base; use your favorite brand or homemade.
- Olive Oil: Brushed on the pita to crisp up the crust.
- Italian Seasoning: Adds a flavorful blend of herbs to enhance the taste.
For the exact measurements of the ingredients, see the printable recipe card at the bottom of this article.
Kitchen Tools You Need To Make Chicken Onion Pita Pizza
- Oven: To bake the pita pizzas to perfection.
- Baking Sheet: Holds the pita pizzas while they bake in the oven.
- Measuring Spoons: Ensures you get the right amount of olive oil and seasoning.
- Basting Brush: For brushing the olive oil evenly over the pita bread.
- Knife and Cutting Board: To slice the onions and prepare any other toppings.
- Spoon or Ladle: To spread the tomato sauce over the pita.
Did you know that the pita bread makes a great instant pizza crust? If you have a package of pita breads at home, you can make very tasty individual pizzas in less than 20 minutes!
How To Make Chicken Onion Pita Pizza
- Preheat your oven to 450°F to get it nice and hot.
- Place your pita breads on a baking sheet, arranging them in a single layer.
- Lightly brush the top of each pita with olive oil to help them crisp up while baking.
- Spread a generous amount of tomato sauce over each pita using a spoon or ladle.
- Sprinkle a pinch of Italian seasoning over the sauce for an extra burst of flavor.
- Top each pita with shredded cheese, covering the sauce evenly.
- Add the chicken pieces and onion slices on top of the cheese.
- Bake the pita pizzas in the preheated oven for about 10 minutes or until the cheese is melted and bubbly.
Making a pita pizza is very easy – just use the round pita as a pizza base, add tomato sauce, toppings and cheese and bake in a preheated oven for 10 minutes. You can even have a pita pizza making party where everyone picks their own toppings to put on the pita pizza – so fun!
Serving Suggestions
- Serve these Chicken Onion Pita Pizzas with a fresh green salad for a light and balanced meal.
- Pair them with a side of roasted vegetables or a bowl of soup for added comfort and warmth.
- For a fun appetizer or party snack, cut the pita pizzas into small wedges and serve them on a platter. Check out this party idea >> best cheeses for a party platter and festive food ideas.
- Enjoy with a dollop of Greek yogurt or sour cream on the side for a tangy twist.
- Add a drizzle of balsamic glaze or hot honey over the top for a gourmet touch.
You can use any kind of pita bread for making pizzas – it doesn’t matter if the pita has a pocket inside or not. Any pita baked in the hot oven with the toppings makes a yummy pizza crust.
Tips For Success
- Choose the Right Pita Bread: You can use any type of pita bread, with or without pockets. For a crispier crust, opt for thinner pita bread, and for a softer, chewier crust, choose a thicker variety.
- Preheat Your Oven: Make sure your oven is fully preheated to 450°F before baking. This ensures that the pita crust becomes perfectly crispy while the toppings cook evenly.
- Distribute Toppings Evenly: Spread the tomato sauce evenly and ensure the cheese and toppings are well-distributed across each pita. This prevents soggy spots and ensures every bite is flavorful.
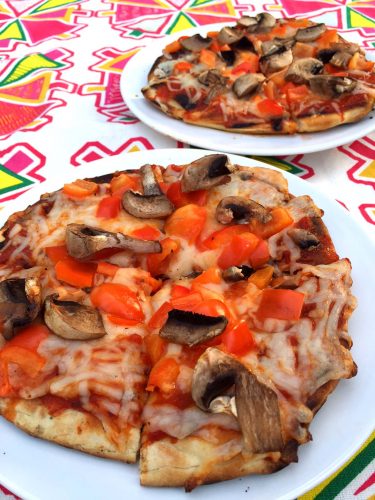
- Customize Your Pizza: Feel free to customize your pita pizzas with different toppings like bell peppers, olives, mushrooms, or even some spicy pepperoni. This recipe is highly adaptable, so use what you have on hand!
- Use Leftover Chicken: This recipe is an excellent way to use up leftover chicken from other meals. If using leftover chicken, shred or chop it into small pieces so it heats through quickly in the oven.
- Watch the Baking Time: Every oven is different, so keep an eye on your pizzas while they bake. You want the cheese to be fully melted and bubbly, but not overly browned.
- Serve Immediately: Pita pizzas are best enjoyed fresh out of the oven while the cheese is still gooey and the crust is crispy. Serve them right away for the best texture and flavor.
- Experiment with Seasonings: While Italian seasoning adds a great flavor, you can experiment with other spices like garlic powder, red pepper flakes, or oregano to suit your taste.
- Reheat for Best Results: If you have leftovers, reheat them in the oven or on a stovetop skillet to keep the crust crispy. Avoid microwaving as it may make the pita soggy.
This recipe makes a quite unusual pizza – a chicken onion pita pizza :) The toppings for this pizza are chicken pieces and onion slices, added on top of tomato sauce and sprinkled with cheese – so filling and yummy! Also, using the chicken pieces as a pizza topping is just one of the great ways to use leftover chicken! If you don’t have cooked chicken on hand, you can also use canned chicken.
Variations and Substitutions
- Change Up the Protein: Don’t have chicken on hand? No problem! Swap it out with cooked turkey, ground beef, or even crumbled sausage for a different flavor profile. For a vegetarian version, try using chickpeas or sautéed mushrooms as a tasty and satisfying alternative.
- Go Cheese Crazy: While shredded mozzarella is a classic choice, feel free to mix it up with other cheeses like cheddar, feta, gouda, or even blue cheese for a bolder flavor. Combining different cheeses can add a unique taste and texture to your pita pizzas.
- Try Different Sauces: Tomato sauce is a great base, but you can experiment with other sauces like pesto, barbecue sauce, or even a white garlic sauce for a new twist. Each sauce will bring its own flavor, making your pita pizza feel like a completely different dish.
- Make It Spicy: If you love a bit of heat, consider adding some red pepper flakes, sliced jalapeños, or a drizzle of hot sauce. Spicy toppings can elevate the flavor and add a kick to your meal.
- Add More Veggies: Load up your pita pizza with more vegetables like bell peppers, spinach, olives, zucchini, or cherry tomatoes. Not only will this add more flavor and color, but it will also make your pizza more nutritious.
- Switch the Bread: If you don’t have pita, try using naan bread, flatbread, or even tortillas for your base. Each will provide a different texture, allowing you to find your favorite!
- Herb It Up: Fresh herbs like basil, parsley, or cilantro can add a burst of freshness to your pizza. Sprinkle them on just before serving to enhance the flavor.
- Gluten-Free Option: Use gluten-free pita or flatbread to make this recipe suitable for those with gluten sensitivities or following a gluten-free diet.
- Dairy-Free or Vegan: Substitute regular cheese with a dairy-free or vegan cheese alternative and choose a plant-based protein like tofu or tempeh to make this recipe vegan-friendly.
- Kid-Friendly Twist: Let your kids make their own pita pizzas, adding their favorite toppings. This is a great way to get them involved in the kitchen and encourage them to try new foods.
Storage and Reheating
- Storage: If you have any leftover Chicken Onion Pita Pizzas, allow them to cool completely before storing. Place them in an airtight container or wrap them tightly in plastic wrap or aluminum foil. You can keep them in the refrigerator for up to 3 days.
- Freezing: To freeze the pizzas, place them on a baking sheet and freeze them until they are firm. Then, transfer them to a freezer-safe bag or container. They will keep well in the freezer for up to 2 months. When you’re ready to enjoy them, thaw in the refrigerator overnight.
- Reheating in the Oven: For the best results, reheat your pita pizzas in the oven. Preheat the oven to 375°F, place the pizzas on a baking sheet, and bake for about 5-7 minutes or until heated through and the cheese is bubbly again.
- Reheating on the Stovetop: You can also reheat them on a stovetop skillet over medium heat. Cover with a lid and heat for 3-5 minutes, or until the cheese melts and the crust is crispy.
- Avoid Microwaving: While you can reheat these in the microwave, it may cause the crust to become soggy. If using a microwave, heat in short intervals and check frequently to avoid overcooking.
Frequently Asked Questions
What kind of pita bread should I use for this recipe?
You can use any type of pita bread for this recipe, whether it has a pocket or not. Thinner pita bread will create a crispier crust, while thicker pita bread will result in a softer, chewier base. Both work well, so feel free to use what you have on hand!
Can I make this recipe gluten-free?
Yes, you can make this recipe gluten-free by using gluten-free pita bread. Many grocery stores carry gluten-free pita or flatbread options that will work perfectly for this recipe. Just be sure to check the packaging to ensure it meets your dietary needs.
What other toppings can I add to my pita pizza?
This recipe is very versatile, and you can add a wide variety of toppings to your pita pizza. Consider adding vegetables like bell peppers, olives, mushrooms, or spinach. You can also add different cheeses, such as feta or cheddar, or even try different proteins like sausage or pepperoni.
How do I keep the pita pizzas from getting soggy?
To prevent soggy pita pizzas, make sure to brush the pita bread lightly with olive oil before adding the tomato sauce. This creates a barrier that helps keep the crust crispy. Additionally, avoid using too much sauce or overly wet toppings, as these can add excess moisture to the pizza.
Can I make these pita pizzas ahead of time?
Yes, you can prepare these pita pizzas ahead of time! Assemble the pizzas as directed, then cover and refrigerate them for up to 24 hours before baking. When ready to eat, simply pop them in the preheated oven and bake as instructed.
What’s the best way to reheat leftover pita pizzas?
The best way to reheat leftover pita pizzas is in the oven or on a stovetop skillet. This helps maintain the crispy texture of the crust. Avoid microwaving if possible, as it can make the crust soggy. For more details on reheating, refer to the “Storage and Reheating” section above.
Can I freeze these pita pizzas?
Yes, you can freeze the pita pizzas. To do so, freeze them on a baking sheet until firm, then transfer them to a freezer-safe bag or container. They will keep for up to 2 months in the freezer. Thaw them in the refrigerator overnight before reheating in the oven.
Other Easy Chicken Recipes
Simple Chicken Fried Rice: Whip up this quick and tasty chicken fried rice for a perfect weeknight dinner that’s ready in minutes.
Clay Pot Chicken with Potatoes Recipe: Enjoy tender chicken and flavorful potatoes cooked to perfection in a traditional clay pot for a comforting meal.
Step-by-Step Chicken Fajitas Recipe: Follow this easy guide to create sizzling chicken fajitas with a blend of spices, peppers, and onions.
Other Easy Pita Recipes
Whole Wheat Pita Pocket Chicken Fajitas: Savor juicy chicken and colorful veggies wrapped in a wholesome whole wheat pita pocket for a delicious, portable meal.
Crispy Pita Chips in the Air Fryer: Make perfectly crispy and crunchy pita chips in minutes using your air fryer with just a few simple ingredients.
Quick Air Fryer Pizza with Pita Bread: Create a delicious, personal-sized pizza with pita bread in your air fryer in under 10 minutes.
Oven-Baked Pita Chips Recipe: Make healthy and crunchy pita chips in the oven with minimal ingredients for the perfect snack or appetizer.
Chicken Onion Pita Pizza Recipe
Ingredients
- 4 pita breads
- 8 oz chopped cooked chicken
- 1 onion sliced
- 8 oz shredded cheese
- 8 oz tomato sauce
- 1/2 tbsp olive oil
- 1 tsp Italian seasoning
Recommended Kitchen Tools (click the links below to see the items used to make this recipe)
Instructions
- Preheat the oven to 450F.
- Put the pita bread on a baking sheet.
- Brush the pita bread with olive oil.
- Spoon some tomato sauce on the pita and spread evenly.
- Sprinkle a little Italian seasoning over the tomato sauce.
- Sprinkle shredded cheese over the pita pizza.
- Add the chicken pieces and onion slices on top.
- Put the pita pizza in the preheated oven and bake for 10 minutes.
Nutrition
Enjoy this yummy chicken onion pita pizza! For more pita recipes, check out sausage pita pockets recipe, pita chips recipe and pita dough recipe.



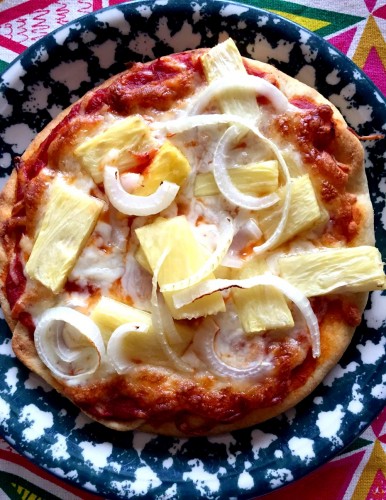
This chicken onion pita pizza is so easy and delicious!
Such a great way to use up leftover chicken. Thanks for the idea!