No-Bake Biscoff Cheesecake Recipe
This post may contain affiliate links (disclosure).
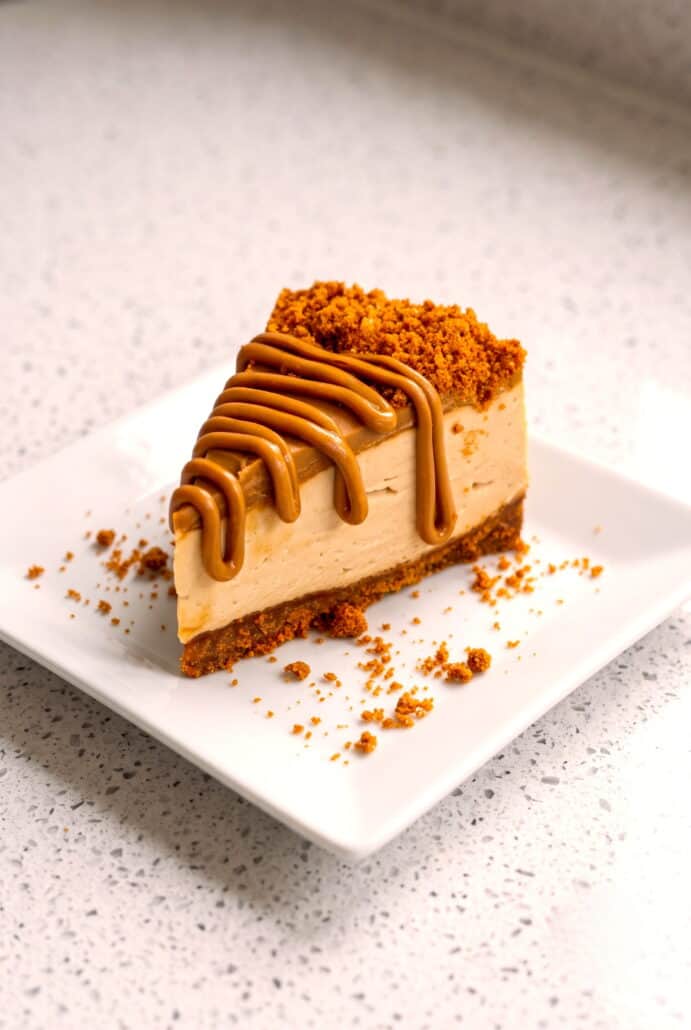
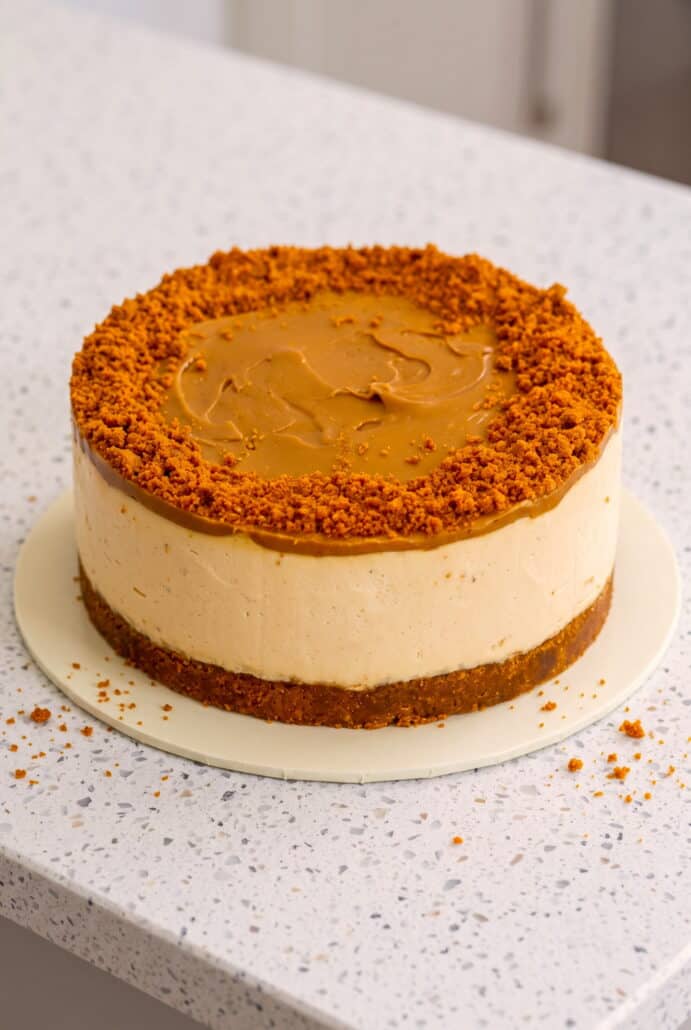
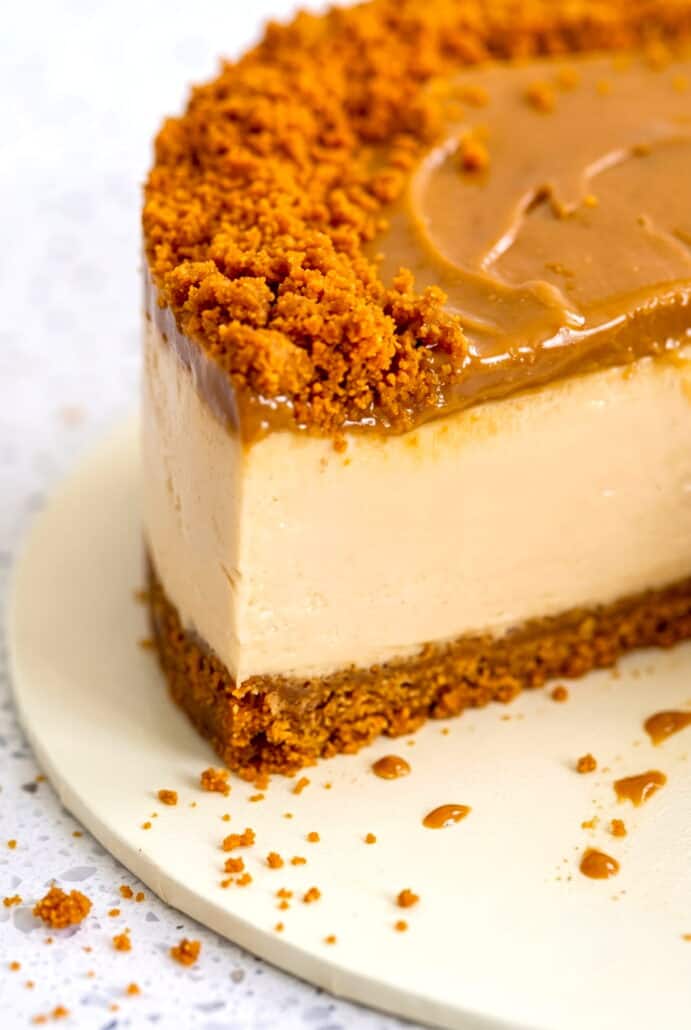
This Biscoff cheesecake is the perfect dessert when you want something easy, creamy, and full of cookie butter flavor. The crunchy Biscoff crust pairs beautifully with the smooth cheesecake filling and sweet melted topping. Best of all, there is no baking required, so you can make this impressive dessert with very little effort.
Want to save this recipe?
Why You’ll Love Biscoff Cheesecake
- This cheesecake is rich, creamy, and full of Biscoff flavor. The cookie butter filling is smooth and indulgent. The crunchy crust adds the perfect contrast. Every bite tastes sweet, spiced, and delicious.
- It is completely no-bake. You do not need to turn on the oven. The simple method makes it great for beginners. Most of the work is just mixing, chilling, and assembling.
- This recipe uses only five main ingredients. The short ingredient list keeps preparation easy. You can find everything in most grocery stores. There are no complicated steps or special techniques.
- It is a great make-ahead dessert. You can prepare it the day before serving. The cheesecake becomes firmer and easier to slice as it chills. This makes it perfect for parties and holidays.
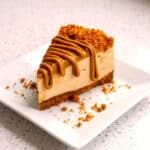
- The finished cheesecake looks impressive with very little effort. The smooth Biscoff topping gives it a beautiful finish. Crushed cookies add texture and decoration. A drizzle of melted Biscoff over each slice makes it even more special.
Ingredients For Biscoff Cheesecake
- Biscoff cookies – These make the crunchy crust and the crumb topping. Their caramelized flavor gives the cheesecake its signature taste.
- Unsalted butter – Melted butter helps hold the cookie crust together. It also adds richness.
- Double cream – Cold double cream makes the filling thick, smooth, and creamy. Heavy whipping cream or thickened cream can also be used.
- Full-fat cream cheese – This creates the rich cheesecake texture. Use full-fat cream cheese for the best set.
- Biscoff spread – This flavors the filling and creates the smooth topping. A little extra can be drizzled over each slice before serving.
For the exact measurements of the ingredients, see the printable recipe card at the bottom of this article.
How To Make Biscoff Cheesecake
- Crush the Biscoff cookies into fine crumbs, then stir them together with the melted butter.
- Press the cookie mixture firmly into the bottom of a 7-inch springform pan.
- Place the crust in the refrigerator so it can firm up while you prepare the filling.
- Add the cold cream, full-fat cream cheese, and Biscoff spread to a large bowl.
- Whip the mixture with an electric mixer until it becomes thick, smooth, and able to hold its shape.
- Spread the cheesecake mixture evenly over the chilled crust and smooth the surface.
- Refrigerate the cheesecake for at least 3 hours, or leave it overnight for the firmest texture.
- Gently warm the Biscoff spread for the topping until it is soft enough to pour.
- Pour most of the melted spread over the chilled cheesecake and carefully smooth it across the top.
- Sprinkle the crushed Biscoff cookies around the edge, then chill the cheesecake for another hour.
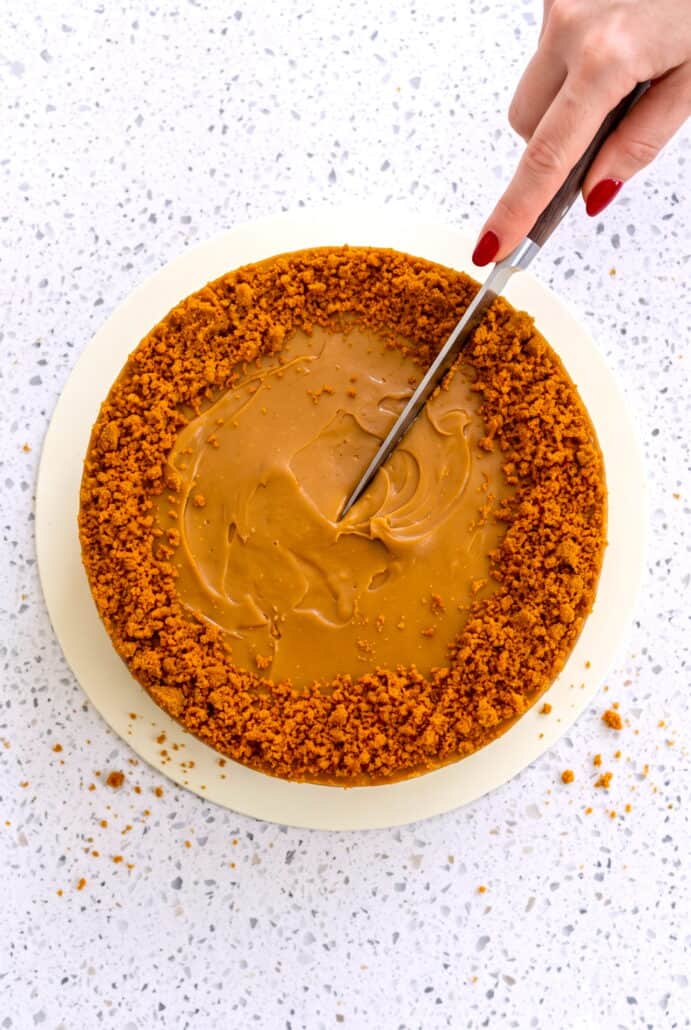
- Release the cheesecake from the pan and cut it into 12 neat slices using a warm, clean knife.
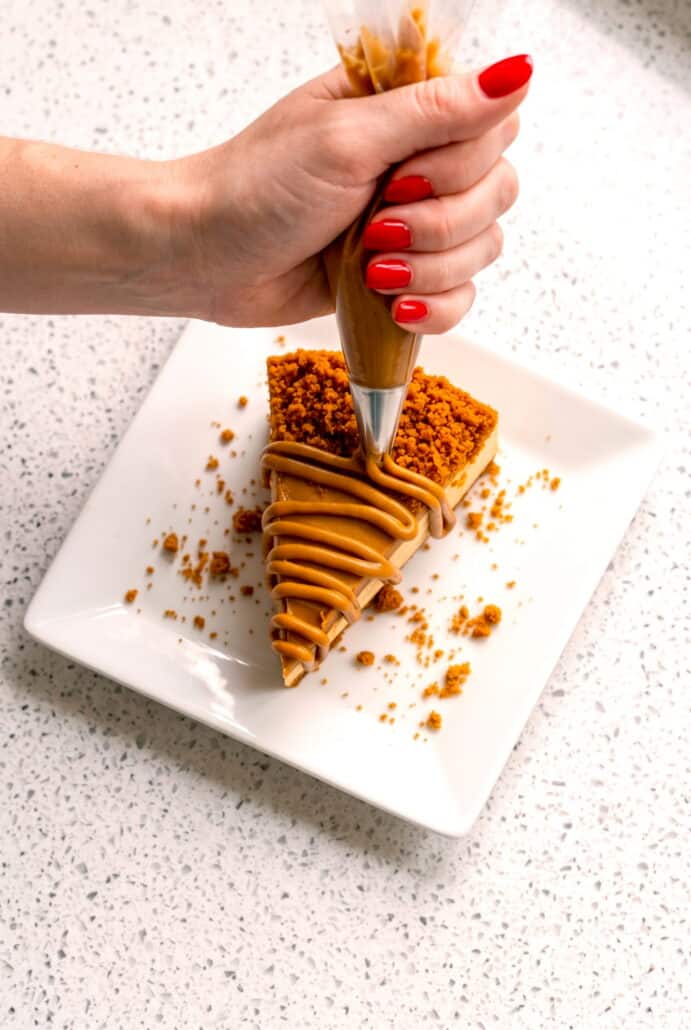
- Drizzle the reserved melted Biscoff spread over each slice with a piping bag or spoon before serving
Serving Suggestions
- Serve Biscoff cheesecake after a comforting meal of roasted chicken breast.
- Pair each chilled slice with a warm mug of Nutella hot cocoa.
- Add Biscoff cheesecake to a dessert table alongside chocolate chip cookies.
- Serve it after a cozy dinner of homemade beef stew.
- Pair the creamy cheesecake with fresh strawberry fruit salad for a lighter contrast.
- Enjoy a slice with homemade iced coffee for an easy afternoon treat.
Tips For Success
- Use cold double cream straight from the refrigerator. Cold cream whips more easily and helps the cheesecake filling become thick. The mixture should hold its shape and look similar to soft ice cream before you spread it over the crust.
- Choose full-fat cream cheese for the best texture. Reduced-fat or light cream cheese contains more water and may stop the cheesecake from setting properly. Drain away any liquid before adding the cream cheese to the bowl.
- Crush the Biscoff cookies into fine, even crumbs. Smaller crumbs make the crust easier to press into the pan. They also help the base hold together when you cut the cheesecake.
- Mix the crushed cookies and melted butter thoroughly. Every crumb should be lightly coated with butter. This creates a firm crust that is less likely to crumble when served.
- Press the crust firmly into the bottom of the pan. Use the back of a spoon to create an even layer. Chill the crust while you prepare the filling so it has time to firm up.
- Whip the filling until it is very thick. Stop when it holds its shape and has the texture of ice cream. Do not continue mixing after this point because overwhipping may cause the mixture to split.
- Use an electric mixer when possible. It makes it easier to create a smooth and thick filling. Scrape down the sides of the bowl so all the cream cheese and Biscoff spread are evenly combined.
- Give the cheesecake enough time to chill. It needs at least three hours before the topping is added. Chilling it overnight will make it firmer and easier to slice.
- Melt the Biscoff spread very gently. It only needs to become soft and pourable. Do not let it get hot because a hot topping could soften the chilled cheesecake filling.
- Smooth the melted Biscoff topping carefully. Use the back of a spoon without pressing down into the filling. Sprinkle the crushed cookies around the edge before returning the cheesecake to the refrigerator.
- Chill the finished cheesecake for another hour when time allows. This helps the topping set and gives you cleaner slices. The cheesecake can be cut sooner, but the slices may not look as neat.
- Warm your knife before removing and slicing the cheesecake. Run it under hot water, dry it, and carefully move it around the inside edge of the pan. For clean portions, rewarm and wipe the knife between every cut.
- Add the final Biscoff drizzle after the cheesecake has been cut. Place each slice on a serving plate first. Use a piping bag or spoon to drizzle the reserved melted spread neatly over each serving.
Variations And Substitutions
- Use heavy whipping cream instead of double cream – Heavy whipping cream works well if double cream is not available. Choose one with at least 35 percent fat so the cheesecake filling can whip properly and hold its shape.
- Use thickened cream in Australia – Thickened cream can be used in place of double cream. Make sure it is very cold before mixing it with the cream cheese and Biscoff spread.
- Try another full-fat cream cheese brand – Philadelphia cream cheese is easy to blend, but another full-fat brand can also work. Drain off any excess liquid before using it so the filling does not become too soft.
- Make a thicker cookie crust – Use a little more of the Biscoff cookie mixture if you prefer a more substantial base. Press it down firmly and evenly so it stays together when sliced.
- Add more crushed cookies on top – Sprinkle extra Biscoff crumbs over the cheesecake for added crunch. You can cover the full surface or arrange them only around the edge.
- Change the decoration – Instead of smoothing all the melted Biscoff spread over the cheesecake, reserve some for serving. Drizzle it over each neatly cut slice using a spoon or piping bag.
- Create a simple swirl – Add small spoonfuls of melted Biscoff spread to the top and gently swirl them with the tip of a knife. Avoid pressing too deeply into the cheesecake filling.
- Serve the topping on the side – Place the melted Biscoff spread in a small serving bowl and let everyone add their own drizzle. This also makes it easier to control the sweetness of each slice.
- Make smaller individual portions – Divide the crust and filling between small dessert cups instead of using one large pan. Chill them until firm, then add melted Biscoff spread and crushed cookies before serving.
- Leave off the crumb topping – The cheesecake can be finished with only the smooth melted Biscoff layer. This gives it a simple, polished appearance while keeping the same cookie butter flavor.
- Freeze it for later – Freeze the cheesecake before adding the topping. Thaw it completely in the refrigerator while it is still in the pan, then decorate it before serving.
Storage And Reheating
- Store the Biscoff cheesecake in the refrigerator for up to 3 days. Keep it in the pan and cover it without letting the covering touch the top.
- For longer storage, freeze the cheesecake before adding the topping. Leave it in the pan and wrap it well before freezing.
- Thaw the frozen cheesecake in the refrigerator for about 24 hours, or until completely defrosted. Add the melted Biscoff topping and crushed cookies after thawing.
- This cheesecake does not need reheating. Serve it chilled straight from the refrigerator for the best texture.
Frequently Asked Questions
Does Biscoff cheesecake need to be baked?
No, this Biscoff cheesecake is completely no-bake. The crust is made by mixing crushed Biscoff cookies with melted butter, and the filling is whipped until thick before being spread over the chilled base. The cheesecake firms up in the refrigerator instead of the oven. This makes it an easy dessert when you want something impressive without baking.
How long does Biscoff cheesecake need to chill?
The cheesecake should chill for at least 3 hours after the filling is added. After you add the melted Biscoff topping and crushed cookies, chill it for another hour if possible. This gives the cheesecake a total chilling time of about 4 hours. For the firmest texture and neatest slices, you can leave it in the refrigerator overnight.
Want to save this recipe?
Can I make Biscoff cheesecake ahead of time?
Yes, this cheesecake is a great make-ahead dessert. You can prepare the crust and filling the day before you plan to serve it, then let the cheesecake chill overnight. Add the melted Biscoff topping and crushed cookies before serving, or finish the topping earlier and allow it to set in the refrigerator. The longer chilling time also helps the filling become firm and easy to slice.
Why is my Biscoff cheesecake filling too soft?
The filling may be too soft if the cream was not cold enough, the cream cheese contained too much liquid, or the mixture was not whipped until thick. Use cream straight from the refrigerator and choose full-fat cream cheese. Drain off any visible liquid from the cream cheese before using it. Whip the mixture until it holds its shape and has a texture similar to thick ice cream.
Can I use light cream cheese?
Full-fat cream cheese is the best choice for this recipe. Light or reduced-fat cream cheese contains more water, which may prevent the cheesecake from setting properly. A soft filling will also be harder to remove from the pan and cut into neat slices. For the most reliable results, use full-fat cream cheese and drain away any excess liquid.
What kind of cream should I use?
Use cold double cream, heavy whipping cream, or thickened cream. Heavy whipping cream should contain at least 35 percent fat so it can whip properly and help the cheesecake hold its shape. Do not use single cream or half-and-half because they do not have enough fat for this filling. Keep the cream refrigerated until you are ready to mix it.
How do I keep the Biscoff topping from melting the cheesecake?
Melt the Biscoff spread very gently until it becomes soft and pourable. It should not be hot when you add it to the chilled cheesecake. A hot topping can soften the filling and make the surface difficult to decorate. Let the spread cool slightly if needed, then pour it over the cheesecake and smooth it carefully with the back of a spoon.
How do I remove the cheesecake from the pan?
Warm a dinner knife under hot water, then dry it well. Carefully run the knife around the inside edge of the pan, wiping and warming it again as you work. Release the sides of a springform pan slowly. For a loose-bottomed pan, place the pan on a tall glass and carefully lower the outer ring so the cheesecake stays supported.
How do I cut neat cheesecake slices?
Use a sharp knife warmed under hot water. Dry the knife before making the first cut, then wipe, rewarm, and dry it again between each slice. The cheesecake will be easier to cut after it has chilled for the full amount of time. Place each slice on a serving plate before adding the final drizzle of melted Biscoff spread with a piping bag or spoon.
Can Biscoff cheesecake be frozen?
Yes, but freeze the cheesecake before adding the topping. Keep it in the pan and wrap it well before placing it in the freezer. When you are ready to serve it, thaw it in the refrigerator while it is still inside the pan. Allow about 24 hours for it to defrost completely, then add the melted Biscoff spread and crushed cookie topping.
How long does Biscoff cheesecake last in the refrigerator?
Store the cheesecake in the refrigerator for up to 3 days. You can keep it inside the pan and cover it carefully so the covering does not touch the decorated surface. The cheesecake should remain chilled until you are ready to serve it. Keeping it cold helps the filling stay firm and creamy.
Does Biscoff cheesecake need to be reheated?
No, this cheesecake should not be reheated. It is designed to be served chilled straight from the refrigerator. Warming it could soften the filling and melt the topping. For the best texture, keep it refrigerated and remove each slice only when you are ready to serve it.
Other Easy Cheesecake Recipes
- Japanese Yogurt Cheesecake
- Butterscotch Graham Cracker Cheesecake Bars
- Cheesecake Brownies With Cream Cheese
- Instant Pot Pumpkin Cheesecake
- Oreo Cheesecake Cookies With Cream Cheese
- Pumpkin Spice Cheesecake
No-Bake Biscoff Cheesecake
Want to save this recipe?
Ingredients
- 7 oz Biscoff cookies crushed
- 3 oz unsalted butter melted
- 1¼ cups cold double cream heavy whipping cream, or thickened cream
- 14 oz full-fat cream cheese
- 7 oz Biscoff spread
- 5 oz Biscoff spread gently melted for the topping
- 2 oz Biscoff cookies finely crushed for the topping
Instructions
- Combine 200 grams of crushed Biscoff cookies with 80 grams of melted unsalted butter. Mix until all the crumbs are evenly coated.
- Press the cookie mixture firmly into the bottom of a 7-inch springform pan or loose-bottomed cake pan. Place the pan in the refrigerator while you make the filling.
- Pour 300 milliliters of cold cream into a large mixing bowl. Add 400 grams of full-fat cream cheese and 200 grams of Biscoff spread.
- Beat the mixture with an electric mixer until it is very thick and holds its shape. The texture should be similar to thick ice cream.
- Spoon the cheesecake filling over the chilled cookie crust. Smooth the top evenly with a spatula.
- Refrigerate the cheesecake for at least 3 hours. Chilling it overnight will give it an even firmer texture.
- When you are almost ready to serve, gently melt 150 grams of Biscoff spread in the microwave or in a small saucepan. Do not let it become hot.
- Pour most of the melted Biscoff spread over the chilled cheesecake while it is still inside the pan. Gently smooth it over the top with the back of a spoon.
- Sprinkle 50 grams of finely crushed Biscoff cookies around the edge of the cheesecake. Reserve a small amount of melted Biscoff spread for serving.
- Return the cheesecake to the refrigerator for 1 additional hour so the topping can set and the slices will be neater.
- Run a warm, dry knife around the inside edge of the pan, then carefully release the cheesecake. Cut it into 12 neat slices, dipping the knife in hot water and wiping it dry between each cut.
- Place the slices on serving plates. Drizzle the reserved melted Biscoff spread over each slice using a piping bag or spoon.
Notes
- Use cold cream and full-fat cream cheese for the best texture.
- Freeze without the topping and thaw in the refrigerator.
Nutrition
More Dessert Recipes
- Brownie Pudding | Easy Fudgy Chocolate Dessert Recipe
- Strawberry Pretzel Salad
- Peanut Butter Sheet Cake