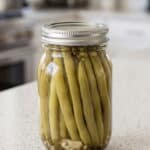
Dill Pickled Green Beans
These Dill Pickled Green Beans are crunchy, tangy, and packed with fresh dill flavor. Garlic and optional red pepper flakes add even more delicious flavor to every jar. This easy canning recipe is a great way to turn fresh green or yellow beans into flavorful homemade dilly beans you can enjoy later.
Servings: 32
Calories: 25kcal
Ingredients
- 4 pounds green beans or yellow beans
- 8 heads fresh dill
- 1/2 cup salt pickling
- 4 cups white vinegar 5%
- 4 cups water
- 1 tsp red pepper flakes optional
- 8 garlic cloves optional
Instructions
- Sterilize the pint jars and lids so they are ready for filling. Wash the green beans, trim the ends, and cut them into 4-inch pieces.
- Add the fresh dill to the sterilized jars. Add one garlic clove to each jar if using.
- Pack the green beans upright into the jars, leaving 1/2 inch of headspace. Trim the beans as needed so they fit properly.
- Add the pickling salt, white vinegar, water, and optional red pepper flakes to a medium saucepan. Bring the mixture to a boil.
- Carefully pour the hot brine over the green beans, leaving 1/2 inch of headspace. Wipe the jar rims clean, add the lids, and tighten until fingertip-tight.
- Place the jars in the canner and add more water if needed. Bring the water to a boil and process pint jars for 10 minutes below 6,000 feet in elevation or 15 minutes above 6,000 feet.
- When processing is complete, turn off the heat. Remove the jars and place them on the counter to cool, or allow them to begin cooling in the canner.
- Let the jars cool for 24 hours. Check that each jar has sealed properly, then label and store for up to 1 year.
Notes
- For the crunchiest dilly beans, use fresh, tender beans that are about 5 to 6 inches long.
- This recipe gives processing times for pint or smaller jars. Quart-jar processing times are not provided in the source recipe.
Nutrition
Calories: 25kcal | Carbohydrates: 4g | Protein: 1g | Fat: 0.1g | Saturated Fat: 0.03g | Polyunsaturated Fat: 0.1g | Monounsaturated Fat: 0.01g | Sodium: 1775mg | Potassium: 127mg | Fiber: 2g | Sugar: 2g | Vitamin A: 429IU | Vitamin C: 7mg | Calcium: 27mg | Iron: 1mg